***************************
To prepare any vessel for long-range cruising requires quite a bit of outfitting. On this page I'll cover :
- Installation of a diesel generator
- Single Sideband radio equipment hookup
- Radar and wind instrument connections to the Garmin 740S chartplotter
- Dinghy davits and our search for the perfect dinghy
- Wind turbine generator tweaking
- Solar panel mounting
- And much more
If you want to quickly search for a particular topic, you can use the "Ctrl F" function to bring up a "Find" box in MS Windows and type in your search word or phrase.
Final Stats
Here are a few stats to chew on regarding our 5 months of cruising:
Cruising through the Bahamas was almost exactly the same going and coming back. We motored about 66 hours, motor-sailed 9.5, and sailed 6 going. On the way back, we motored 62 hours, motorsailed 0, and sailed about 17. Distance traveled from Bimini to Mayaguana was about 500 miles. On the way back through the Bahamas we had very little wind as it was getting into the summer season.
The big difference was from the Bahamas to the eastern Caribbean and then back. Taking the "thornless path", we motored 182 hours and sailed 76 for a distance of 1325 miles. Returning we motored 41 hours and sailed 154 for a distance of 877 miles. As you can see, we were able to sail much more, and more comfortably, on the return trip. The difference in distances was primarily due to the fact that, on the way to the Caribbean, we followed the coast of the DR and also spent a lot of time wandering around the U.S. and British Virgin Islands. On the return, we followed the rhumb line from Puerto Rico to the Turks and Caicos, shortening that part of the trip by over 100 miles.
Grand totals from Charleston, SC round-trip to Jacksonville, FL were:
Motored 457.5 hours
Motor-sailed 33.5 hours
Sailed 224 hours
Total travel time 715 hours
Total distance 4018 miles
Total fuel 483 gallons for an average fuel burn rate of 0.91 gallons/hour at 2550 RPM
Did We Make The Right Decisions In Outfitting C-Time?
It’s hard not to look at other boats and the way they’re
equipped without wondering if we chose the right boat for our needs, and if we
made the right decisions in the way we outfitted her. Here’s a rather long breakdown of what we
think we did right, and what we might do differently.
Good charts are a must, no matter where you’re
traveling. Our Garmin 740S chartplotter
comes preloaded with the Explorer Charts for the Bahamas. Explorer Charts are recognized as containing
some of the most accurate information on the Bahamas. The charts show preferred routes to and
between most, if not all, the islands, anchorages, and marinas. Our 5’ draft never touched bottom throughout
the Bahamas, even at low tide in very shallow anchorages. These charts were invaluable, and we never
had to refer to paper charts. Also, the
integration of AIS and radar with the chartplotter has given us great comfort
when traveling at night close to shore and amongst unlit fishing boats. Although neither are really necessary, we’ve
been able to see other boats on the chartplotter before they were visible to
our eyes. We’ve also been able to track
storms and rain, determine distance to other vessels and calculate relative
speeds, and see the names of vessels that have AIS transponders. Carla really dislikes travelling close to
shore at night, but a radar return that coincides with what you see on the
chartplotter is very reassuring.
We have been very satisfied with our choice of dinghy and
outboard. The RIB (rigid inflatable
boat) has allowed us to transport 30 gallons of diesel fuel in Jerry Cans on at
least two occasions. The 9.8 hp Tohatsu outboard
is just big enough to plane the dinghy with the two of us, and made for much shorter
and dryer rides across Elizabeth Harbor at Georgetown. The heavier outboard does require a hoist to
get it aboard C-Time, but we feel the convenience and safety of a planning
dinghy outweighs the inconvenience of its heft.
When planing with only one
person onboard, a tiller extension is essential so that you can get your weight
further forward. Lastly, the lightweight
11’ Caribe dinghy is much easier to hoist up on the davits or on the forward
deck than a heavier dinghy would be.
The water maker has already provided a lot of water and kept
us from having to buy water or go into marinas.
We’ve estimated that the water maker will pay for itself in 1-2 years. On average, we run the generator and water maker about 3 hours every three days. We’ve been able to wash clothes,
take showers every day, and rinse the salt off the boat at the end of each
passage. We normally wash clothes while making water, so the generator only runs during that one period, burning about 0.2 gallons per hour.
Our large solar panel produces a LOT of power, and the wind
turbine makes a significant contribution when winds are 15-20 knots. During the winter months, we’ve seen 10-15
amps from the solar panel in the Dominican Republic, and up to 10 amps from the
wind turbine in 20-25 knot winds.
During the summer in the Caribbean, we generated a total of about 90 amp-hours per day just from the solar panel, enough to run the refrigerator and provide a couple hours of TV-watching each evening. Because we were on the move a lot during the first month and a half, motoring
helped the solar panel and wind turbine keep the batteries fully charged. However, when we slowed down in the USVI’s,
solar and the turbine would only provide a bulk charge to the batteries. This replenished most of our power
consumption, but it never brought the batteries back to 100%. As a result, the battery capacity dropped
and we had to run the generator and battery charger for several hours
to “equalize” the batteries. When Carla
returned to the mainland, she brought back a different solar panel
controller that allows us to adjust the output voltage from the solar
panel, and also allow us to “equalize” the batteries using the solar
panel. I’ve already increased the
voltage setting on the wind turbine so that it doesn’t shut down at too low a
voltage. The end result is that we can sit on the hook indefinitely and not have to run the engine to charge the house bank.
The choices of foam and fabric for the cockpit cushions were
right on. The 3” DryFast foam is the
perfect thickness and softness, and the Sunbrella canvas can be left outside
even when it’s raining. Someone who had
brand new Bottomsider cushions commented on how much more comfortable our
cushions were.
Electric head, enough said.
The Washer/Dryer combo saves us from having to spend long
hours washing clothes on shore. The time
saved can be used for resting or exploring.
We’ve only used a Laundromat one time to wash all the sheets and towels,
and it cost us 2-3 hours of our time, and about $10-$15 in coins and dinghy
gas. As mentioned previously, we typically wash clothes at the
same time as we’re making water so the generator only has to run one time.
The generator became an essential item when we started
planning to put a washer/dryer on board.
However, it also provides a way to charge the
batteries with the shore power charger, it provides power for the water maker, and it allows us to run the A/C if we ever get too
hot at anchor. The Next Gen generator was a
rebuilt unit, but it has performed superbly for over 150 hours now. We definitely like all
the convenience of being able to generate A/C power.
An autopilot is a MUST.
I would be exhausted at the end of a long night without it. With the autopilot, we’re able to walk around
the deck while underway, or read, or work on the blog. The electric autopilot can use a lot of
electrical power, but it’s really the only choice on a boat with a walkthrough
sugarscoop transom and dinghy davits. A
very long passage would deplete the batteries very quickly unless we ran the
auxiliary engine every day.
Although the dinghy davits weren't an absolute necessity, they have given us more options about how to raise the dinghy out of the water each night and how to carry it on passages. We see a lot of people just towing their dinghies behind their boats when transiting short distances between islands, but towing a dinghy costs about a knot in boat speed and shortens the life of the dinghy. As an alternative to using davits at night, people sometimes raise the dinghies out of the water beside the boats using a harness and spinnaker halyard. In our case, the davits provide a support frame for the large solar panel and a way to hang the hammock, so the davits serve multiple purposes for us.
Although the dinghy davits weren't an absolute necessity, they have given us more options about how to raise the dinghy out of the water each night and how to carry it on passages. We see a lot of people just towing their dinghies behind their boats when transiting short distances between islands, but towing a dinghy costs about a knot in boat speed and shortens the life of the dinghy. As an alternative to using davits at night, people sometimes raise the dinghies out of the water beside the boats using a harness and spinnaker halyard. In our case, the davits provide a support frame for the large solar panel and a way to hang the hammock, so the davits serve multiple purposes for us.
The new Icom 802 SSB radio has been useful listening to Chris Parker’s
weather broadcast, as well as requesting and receiving weather and emergency
emails. The GAM Split-Lead antenna has
been working very well. The only regret
we had was wasting money on the used Icom 710 that turned out to be
worthless. Sometimes trying to be frugal
can be very expensive.
We love our large king-sized bed with the 6” inner spring
mattress, 2” foam topper, and quilted top.
However, we’ve found that the aft section of the boat gets very little
ventilation and is usually several degrees warmer than the rest of the interior. While in St. Martin we found ventilators for the four opening ports that draws in a lot of cool, fresh air. This now provides as much ventilation to the master stateroom as a large hatch over a V-Berth.
The fresh water anchor washdown has been very handy. I use it every time we raise anchor to rinse the saltwater off the chain and anchor.
When the foredeck gets salt spray from a rough passage, I use the short
hose at the anchor locker to rinse off the windshield and all of the forward
deck.
The Wi-Fi extender has worked very well when there was an
unsecured hotspot. We’ve been a little disappointed
at the fewer number of available connections than we had expected, but we've been able to pull in signals from a lot of distant hotspots.
In summary, we like C-Time for all her roominess and all the
things we’ve added to make her home. We would probably outfit
another boat similarly to how we’ve outfitted C-Time.
Less Thorny, Maybe.
Thornless, NOT!
Bruce Van Sandt’s book, The Gentleman’s Guide to Passages
South, is THE reference book for many cruisers heading to the Caribbean. Because the initial part of the trip is
against the predominant trade winds and current, it can be a rough and
difficult journey. The book provides
suggestions on how to make the trip more safe and comfortable by carefully
choosing the right weather, time of day, and course. I found the first half of the book a
difficult read and only benefitted from a few pieces of information. The second half of the book provides more
specific suggestions for each leg of the trip.
Although we didn’t closely follow the “rules” before arriving at the
Dominican Republic, we did apply some of the generalities which probably
helped.
While sitting in Luperon Harbor in the D.R., I had time to
study the next passage more carefully, and it probably kept us from leaving
prematurely into very harsh seas.
Although a friend of ours back in the Carolinas felt like we left too
early from Luperon, ahead of a weather front, the view from our perspective was
quite different. Luperon is a very comfortable
place to wait for a while, but we had been there a week, the water is too
filthy to use a watermaker or to go swimming, and I hated emptying the holding
tanks in the harbor. Winds had been
forecast for the week to die down by Saturday or Sunday, so when Sunday rolled
around we were ready to go. The
forecasts were wrong, but we went ahead and left fully expecting the winds to
die quickly.
I guess the lesson is this:
If you follow the book to the letter, you may be sitting in Luperon for
weeks measuring and tabulating wind speed and direction, waiting on the perfect
weather window in order to enjoy a smooth sail.
Or you can do like we did and look for a break in the weather pattern,
follow as many of the book’s suggestions as you can, and just plough
ahead. In this particular case, we
hugged the coastline all the way to the east end of the Dominican Republic and
travelled at night so as to take advantage of the night lee. Instead of 15-20 knot onshore winds, we
motored in 5-10 knot onshore winds. The
end result was that we were able to get to San Juan, Puerto Rico 3 days early
to meet friends, allowing us to rest, shop for supplies, and make a few
repairs.
How Does A Hunter 410 Perform?
After cruising for about 5 months,
covered about 4000 miles of ICW, coastal waters, Bahamas and Turks and Cacos Banks, Caribbean Sea, and the
Atlantic Ocean. When looking for a cruising
boat, our first priority was a comfortable home. We realized that the beamy boats wouldn’t
sail as well as a narrower cruiser, but we figured we would be spending much
more time at anchor than sailing. We don’t
regret buying C-Time at all, as she is very spacious and has a great layout.
When we started out, I said that we would watch weather
closely and not put C-Time through harsh conditions. Well guess what? Weather forecasts are not always totally
accurate. We’ve found ourselves going
through an inlet with 6-7 foot waves spaced 20’ feet apart, we’ve been on the
banks with steep 5-foot wind waves with short intervals, and we’ve been in 8-10
foot sea swells with 3-4 foot wind waves on top of that. Ideally you want to not plough directly into
large waves or swells, but sometimes you just can’t avoid it. Heeling 15-20 degrees
under sail does help cut through the waves, but we sometimes had to slow down to avoid pounding into the troughs. Through all the open water passages, the systems and the interior woodwork have held together just
fine. I'm convinced that Hunters, particularly the 410, are designed to handle offshore seas.
Since we’ve had the opportunity to sail along with another
boat on two separate occasions for a total of over 50 hours, we’ve been able to
compare the 410’s speed and ability to point into the wind. We’ve been able to sail comfortably at 30
degrees from the apparent wind, and about 50 degrees from true wind. When sailing downwind beyond about 140 degrees,
the jib will be in the shadow of the mainsail and will begin to collapse,
especially in rolling seas. We’ve sailed
close-hauled with full sails in about 17 knots of true wind and made 8 knots in
the water. On a broad reach she'll easily handle 25 knots of true wind and make 9 knots under full sails. Furling the jib greatly
increases the angle of sail, as the sail shape becomes very inefficient. The main can be kept full by moving the
traveler to windward and will always have a good shape. The other boat was a 44’ “one-off” from
Australia and was able to maintain about a half to a full knot more than the
410 on a close reach. It also was able to point much
better and continue sailing many times when we had to drop the sails and motor.
As Carla has mentioned on the main page, moving about on a
roomy boat in rough seas or when heeling can be a challenge. The cockpit is very wide, so she couldn’t sit on
the windward side because her legs aren’t long enough to brace against
anything. If several people are in the
cockpit when sailing, it may get a little crowded on the leeward side. Down below, we “leapfrog” from one handhold
to another. After a while you get used
to timing the leaps and just hope that a surprise wave doesn’t throw off your
timing. So far we’ve been able to do
just about anything underway that we would normally do at anchor. After the first week at sea, the bruises healed and we remained bruise-free for the remaining trip.
We like the layout of the head in the “V” area, and we knew
that it would be interesting trying to use it when underway. Since the electric flush toilet is in the
forward head, we prefer and were able to use it for the entire trip.
In summary, the Hunter 410 seems to be a well-built vessel
with very nice accommodations. The roller furling jib and main are not only extremely convenient, but also help keep
the crew safe and dry.
More Lessons Learned
Occasionally we learn things that might be useful to others,
particularly if we learned lessons the hard way. For example, we were heading toward Cambridge
Cay mooring field and were planning to approach through the southwest
entrance. I watched another boat about 5
miles ahead of us on AIS pull into another anchorage north of Cambridge Cay, so
I called them on the VHF and inquired about the conditions there. The captain stated that they were just
waiting for a slack tide before proceeding through the north entrance to
Cambridge Cay, and that the southwest entrance didn’t look good to him. Carla read in the guide that the north
entrance was the preferred one, so we decided to follow the other boat. When we caught up with them, we continued on
past thinking that they were overly cautious.
In fact, Carla suggested that we call them and tell them everything was
ok, even though we were still a couple hours from slack. As we continued toward the cut that leads
between the Bahamas Bank and Exuma Sound, we started seeing "rage", the turbulence that is
caused by opposing winds and the outgoing tide.
From a distance, it didn’t look TOO bad, and I was really hoping our
turnoff was well before the cut. Once we
got close enough to see how big the swells really were, it was too late to try
to turn around and fight the outgoing tide.
Lesson #1, “It’s always worse than it looks from a distance”. Carla tried to be the good crew by going to
the bow to stand watch for rocks. Lesson
#2, “Never leave the cockpit when you’re heading for trouble”. Again, it was too late to yell to her to get
back in the cockpit, so I just did my best to keep the bow heading straight
into the swells. The first few were only
about 3-5 feet, but they were steep and very close together. By the time we were in the middle of the
worst, I thought we were going to break this Hunter in half. I slowed as much as I could without losing
steerage, but the anchor (and Carla’s feet) became completely submerged when
they reached the bottom of a 10-foot swell.
Carla hung on to the forestay for dear life as we shot up 10 feet and
plummeted down 10 feet. It took us long
enough to get away from the danger area that I was able to stop shaking and to put on a
"no-big-deal" face. Both of us said,
“Let’s not do that again”, and we won’t.
And now for a less exciting lesson. I had been taught a long time ago to wipe the
dipstick on a diesel engine before checking the oil level. I was ignoring that instruction thinking that
it really couldn’t make that much of a difference. I started seeing low oil levels only about 50
hours after an oil change, so I added oil and began to worry about the
engine. After adding about 2 quarts and
subsequently finding the level low again, I wiped the dipstick and checked it
again, only to find that it was now about 2 quarts too full. After that I started wiping the dipstick and
THEN checking the oil level, and the level has stayed constant for the next 100
hours of operation.
As of 2/2/14, we’ve been cruising for 3 weeks, traveled
nearly 1000 miles, run the engine for 150 hours, and sailed for only about a
dozen hours. To date, we’ve not
experienced any major equipment issues.
A loose wiring connection caused the chartplotter to not receive a
compass reading from the autopilot, and I burst a small hose on the water maker
when I forgot to open a valve. The
engine has been running great, and there haven’t been any issues with clogged
fuel filters. The wind turbine has finally made a 5-10 amp contribution, as winds have
been 15-20 knots for the last several days and nights.
Lifeline Replacement
If you've read through the "Port" page, you've probably seen that we stripped the plastic coating off our cracked lifelines and tried cleaning the rust off with stainless cleaner. We had hoped that they would be acceptable for a year or two, but the week before we were planning to head south my jeans snagged on a broken strand. We rushed madly to get all the components delivered in time before we left Charleston, but there was a hiccup with UPS and we had to have the marina folks forward the last arriving package. Anyway, the bare 3/16" 1x19 stainless cable came from Performance Yacht Systems (http://www.pyacht.com/shophome.html) at a cost of $172, and all the terminals for the pulpit, pushpit, and 3 gates came from Bargain Boat Parts (http://www.bargainboatparts.com/) at a cost of $638 including 3-day shipping. Installation is fairly straightforward, so I don't have any lessons or advice to share other than to use the bare stainless cable and to use the correct crimping tool. This should extend the life of the cable well beyond that of coated cable. Needless to say, the shiny new stainless cable and terminals look great.
How It Can Appear You've Run Over Your Anchor
I was perplexed yesterday when we anchored in a strong current and a bit of a wind. After setting the anchor, it appeared we had moved against the current and wind and had run over the anchor. What had happened was the strong current was pushing the sagging chain under the bow of the boat, so the chain rose out of the water at an angle that made it appear the anchor was behind us.
More Praise for HomePort
I had previously posted on the main page about my excitement for Garmin's HomePort charting software. Since that time, we've had a chance to use it and found it to be extremely helpful. You can easily download all the information from Active Captain (http://www.activecaptain.com) including marinas, anchorages, hazards, bridges, and much more. We've begun keeping the laptop in the cockpit as we travel down the ICW and look ahead for hazards. Detailed information is provided about each hazard, and fellow cruisers have provided additional comments. In addition, many more anchorages are charted than we've seen in other cruising guides, and each anchorage has detailed and pertinent information. And one feature that I really like is that Active Captain includes fuel prices for most marinas.
Times and Distances
I frequently see people asking boat owners about distances, speeds, and fuel burns. Since I was already plotting our travel path and locations in google maps, I decided to add to the comments sections the total distances traveled each day and the length of time traveling. You can view the comments by clicking on the link below the location map on the main blog page. Hopefully this info will be useful to someone, as well as archive information for us. We're also keeping detailed records in our cruising log, fuel log, and maintenance log using the Evergreen Pacific Log Book (http://www.landfallnavigation.com/evergreenlog.html).
Over the entire trip of nearly 4000 miles, our average fuel burn was 1 gallon per hour at 2550 RPM. The diesel generator burns about 0.2 gallon per hour lightly loaded. At 2550 RPM our speed in the water is about 6.8 knots in smooth water.
Yet Another Chartplotter
 Having read on one of the forums that a cruiser had installed a chartplotter near their berth for keeping nightwatch on their anchor, I started looking for an inexpensive chartplotter for C-Time. Someone at the marina was upgrading theirs, so I snatched their old Garmin 2006C for a very good price. You can see from the photo that I mounted it on the washer/dryer cabinet at the foot of the berth. The external antenna is sitting inside the arch and picks up the satellite signals just fine. It's a bit brighter than I like, and the "cookie crumb trail" is difficult to see with the screen brightness turned all the way down, but I think it's still going to be better than getting out of bed in the middle of the night and trying to figure out where we are in relation to the shore. It also has an anchor alarm that will wake us if we drag, and a clock that lets me know that it's the middle of the night. You can also see our handheld VHF radio in the photo mounted next to the chartplotter. Again, we'll be able to respond to or initiate emergency calls without having to crawl out of bed.
Raw Water Impeller

We weren't sure of the age or condition of the raw water impeller and the exhaust elbow, so before heading out I wanted to take a look at them. The photo of the impeller also serves as a reminder of the direction the vanes need to turn in case I forget. The impeller was in like-new condition, and the rubber o-ring also appeared to be new, so I just re-installed the cover and called it good.
 The exhaust hose is massive and very difficult to bend, so I knew I couldn't force it off without some help. I first removed the elbow from the exhaust manifold and loosened the clamps holding the exhaust hose. After prying the hose from the elbow using two screwdrivers, I was able to twist and pull the elbow off the hose. As you can see from the photo, there is virtually no fouling of the exhaust passages, and there is no buildup around the cooling water inlet. It looks like this elbow is good for a long time. Since the gasket is metallic and crushes each time it's installed, I used a new gasket. After reinstalling everything, a quick engine run revealed no leaks from the water pump housing or from the exhaust hose. As a side note, we make sure to run the engine at full RPMs occasionally while motoring to help prevent fouling of the exhaust elbow.
Carla Calls Me A Sewing Fool


 Just a few more canvas projects. The stern seat cushions use the same DryFast foam used in the cockpit, so we can leave them out in the weather and not worry about them becoming waterlogged. The winch covers, as well as the outboard motor cover, use bungee cords to hold them in place. And finally, the vegetable hammocks were purchased online and heavily modified to reach the end result.
Bought Too Many Provisions, Have to Create More Storage Space

 I had been eyeing the space behind the seatbacks in the salon for a while, but just didn't want to go to all the trouble of cutting up the seatbacks. We had looked at a Hunter 430 and its seatbacks were hinged to allow for storage of the large dining table. Some friends also mentioned that their Hunter had storage areas behind the seats. After we bought provisions last week and had a difficult time finding room for everything, I decided to bite the bullet. It turned out to not be too difficult a project. The starboard seatback is just held in place by several wood screws, and comes out easily as one piece. I used a circular saw and a piece of plywood as a guide to cut the large door. A tablesaw would have made a neater cut, but I had already given mine to our son. The size of the door was chosen to match the width of the two center cushions. A stainless piano hinge was used along the bottom of the door, and two barrel bolt latches were placed at the top of the door to hold the door closed when heeling. There's not a lot of space back there, due to the shape of the hull liner, but it was worth the effort. In the end, we were able to store 24 quarts of boxed milk on the starboard side.
 On the port side, the seatback plywood is in two pieces to make it possible to install the plywood. The two pieces of plywood meet in the middle of the center cushions, so I had to use a backing strip of wood to hold the two sections of the door together. The port storage area held several boxes of cereal, oatmeal, toilet paper, and paper towels. The port side has a little more depth behind the seatback and can hold larger containers. Although the A/C duct takes up some of the space, overall this area provides better storage than the starboard side, so if you're going to pick just one side to create storage I would recommend the port side.
 I also built a wood box around the water maker's pump motor to keep canned goods and storage containers from shifting and causing damage to the water maker and refrigeration components. If the watermaker weren't in this space, a simple divider could be built next to the refrigeration compressor and provide a very large storage area. The watermaker pump motor has air vents on the end of the motor, and these air vents can't be block by stored items. As it turned out, this new boxed-in area held about 48 Coke Zero's, and this helped offset some of the weight of fuel on the port side. We'll probably be constantly trying to shift weight around the boat to keep it even-keeled.
Cockpit Cushions

 This was a fairly straightforward project. I used a special open-celled foam that won't hold water called Dry-Fast. It's slightly more expensive, but we'll be able to leave the cushions in the cockpit and not worry about them getting wet. I first traced the outline of the seats onto clear plastic, then transferred the marks to the 3" thick foam. I used an electric carving knife to cut the foam, then performed some final tweaks to the shapes on the boat. I then layed the foam on the Sunbrella fabric, traced the outline onto the fabric, then cut the fabric to the exact same dimensions as the foam. Cutting the fabric to the same size as the foam helps to keep the fabric tight, especially if you don't use batting. Closures were made using plastic #5 zippers, so we'll never have to worry about corrosion. The fabric color is Sunbrella Navy and complements the Linen bimini and dodger. The total project cost was less than $500.
 TV Speaker Bar

When we bought the TV's, we knew the speakers were inadequate, but we liked the very thin profile of the LED TV as well as the price. I found a 19" speaker bar made by Visio that matched the width of the TV, so I decided to try it out. The audio from the TV is greatly enhanced, but the really nice thing about the bar is that we can send music from our iPhones via Bluetooth.
Another Change to the Refrigeration

The large evaporator box just doesn't fit well inside our freezer compartment. If I were doing it again, I would buy the flat plate and bend it to fit the inside contours of the freezer. I've even thought about removing the rivets from the evaporator and turning it into a flat plate, but I'm afraid I'll kink the refrigerant lines in the process. As a compromise, I removed the lid gas spring and moved the evaporator to the back of the freezer. Now Carla is able to reach the bottom of the freezer, and we can see what's under the evaporator.
Boat Shade

 Even with the trade winds of the Caribbean, the sun can turn the inside of a boat into an oven. One of the last major projects was to fabricate a shade for the boat. I found four large pieces of matching Sunbrella on Ebay for about half of regular price, and was able to cut the pieces I needed out of them. The smaller shade will drape over the boom and be held out to the lifelines with cords. The larger shade will be stretched between the mast and the forestay, and will also be held out to the lifelines. The light color of linen will make it relatively cool under the shade, and will also provide some protection to the boat and equipment.
Dining Table

 The dining table is quite large and can accomodate a good number of people, but when it's just the two of us it's a bit cumbersome to have to scoot around it. Carla has been asking for a smaller table or to do away with it entirely. Not wanting to permanently modify the existing table, I bought an old wood coffee table for about $30 and stripped the old finish. The orginal wood had a beautiful color and grain. The old table top was used as a pattern to mark the napkin holder cutout. A table saw, bandsaw, and jigsaw made easy work of cutting the new table down to size. The full-sized table top will be stored under the forward berth mattress when not in use, and can be fastened on top of the smaller table when we're hosting a party.
Odds and Ends

Even though there's still a lot that I need to do, it's getting harder to stay at it. Distractions, such as hauling the boat last weekend, being sick, and getting ready to move out of our hangar, not only take time away from the remaining boat projects, but they also make it mentally difficult to stay focused. We made some attempts at getting the boat more organized, and I was able to fabricate this lifting harness for the dinghy.
 I was also able to finish putting polyurethane on the removable floorboards and put them back in place. Next, I'll sand the non-removable boards and put a couple coats of polyurethane on them. The last small job for the weekend was changing out the propane tank fitting so that I don't have to use a wrench. This nut can be tightened by hand just like you see on many gas grills. I also brought the tanks home and left it with a propane business to bring the inspection up to date. We've heard that some tanks have ruptured when being filled, and businesses in the Caribbean are hesitant to fill tanks that are outside their inspection dates.
Speaking of organization, I've built up a very nice socket set over the years and want to be able to have them on the boat. Space is at a premium, so I didn't want to use one of the blow-molded cases that take up a lot of room. In my search for ways to organize sockets, I found plastic rails made by Ernst (http://www.ernstmfg.com/tool-organizers/socket-organizers/dura-pro-twist-lock-socket-organizers.html). I paid about $50 for 6 rails and extra clips, but the price should be worth the space savings. I'll post pictures when I get it all set up.
You Never Can Have Too Many Fans

 Carla will probably always be asking for additional fans, so it's on me to determine what is a reasonable number. After reading about someone who installed a fan in the head, it dawned on me that I probably needed to install a few more. Here are photos of new fans in the two heads and in the galley. I really like these fans, as they seem to put out the most volume of air.
Battery Self-Destruction
While walking around inside the boat without any shoes, I felt a little warmth coming from one of the floorboards. The large 4D AGM house battery beneath it was about 110 degrees F and had two slight bulges in the case. The other house battery was fine, but since both were about 7 years old I figured it was time to replace them. After reading all the advice on the forums, I decided to go with the 6-volt Duracell golf cart battery in the EGC2 size. This battery is a true deep-cycle battery with 230 amp-hours capacity. Sams Club had them at about $110 each with a $5 core charge, so I picked up four of them.
 Since the golf cart batteries are 6-volts instead of 12-volts, two of them must be connected in series to make a 12-volt system. This is accomplished by connecting the negative post of one battery to the positive post of the next battery with 2/0 battery cable. Then the boat's battery cables are connected to the free positive and negative posts of each battery pair. The resulting capacity will be 460 amp-hours, 16% more than the old AGM batteries.
Oh, and the best part is that the two old AGM's are worth about $40 at the battery recycler. Good thing I didn't use them to offset the core charge at Sam's. They would have only given me credit for two batteries, even though each AGM weighs as much as two of the 6-volt batteries. I'm $20 in the black on this deal.
Cutless Bearing Remover
When we hauled the boat last year, I felt a little play in the prop shaft at the cutless bearing. I paid a boat yard to replace the cutless bearing on our last boat and wasn't satisfied that they put in the right bearing. This time I wanted to be a little more in control of the job, so I researched bearing removers and found that the one made by Strut Pro (http://www.strutpro.com/) costs $395. Although a nice tool, I just couldn't bring myself to spend that much money on one tool. I bought the materials from McMaster Carr to make my own. Here's the material list:
Low Carbon Steel Bar 3/4"x3"x12"
High Strength Grade 8 Allow Steel Threaded Rod, 3/4"-10 thread x 36"
Ultra-Tough Oil-Lube Bronze Thrust Bearing for 3/4" Shaft Diameter, 1-9/16" ODx3/32" thick
Black Luster-Coated Steel Type A SAE Washer, 3/4" Screw Size
Low-Carbon Steel Tubing, 1.5" OD x 1.260" ID, 0.120" Wall Thickness x 12"
Ultra-coated Grade 8 Steel Hex Nuts, 3/4"-10 Thread
All this material cost about $100 including shipping. I also had to purchase a 1.5" hole saw and a 3/4" drill bit, bringing my total cost to less than $150.
 It took me several nights to drill all the holes in the thick bar, cut the bar, cut the threaded rod, and smooth the cuts with a file. While doing all this metal work, I couldn't help but think of my Dad and the many enjoyable hours he spent fabricating metal parts and tools in his own shop. Until now I didn't understand why he would enjoy it so much, but this is going to be a really nice looking tool and will give me great satisfaction. Before you ask, no it's not for sale, and no I won't make another one.
 Here's the tool in use. The first photo is removing the old bearing and the second photo is installing the new bearing. I calculated that it takes about 500 strokes of the ratchet to remove the bearing. Quite a bit of effort is required to move the old bearing, so this is a fairly lengthy and tiring job. I had thought I might be able to do this with the boat in the water, but it would probably take twice as long and be twice as difficult. I would strongly advise against replacing the bearing without hauling the boat. Although fabrication of the tool and the actual bearing replacement was a major project, it saved us at least $200 and we now have the confidence that we can do it again when the time comes. The payoff was a very definite reduction in vibration from the prop.
Refrigerator/Freezer Insulation
 Our refrigeration has worked fairly well, but I wanted to decrease the amount of compressor run time to help conserve energy. From everything I've read, adding insulation can make a huge difference in the refrigerator's efficiency. The H410 has Corian countertops in the galley which are sealed to the refrigerator box. This makes it very difficult to access the space between the refrigerator and surrounding cabinetry. Basically the only way to gain access is to drill holes, so this I did. While removing items from the storage area behind the refrigerator, I found damp areas that had mold. This was due to a lack of insulation in that area. I drilled three 1/4" holes through the bottom of the plastic cubby bins and shot expanding foam insulation into the void. As you can see from the photo, some foam expanded out of the holes giving a good indication that the void was filled. About a half can of foam was used in this area.
 I also drilled a hole behind the dining seat, but this area seemed to already be filled well with styrofoam. Next I went under the sink and drilled one 5/8" hole as high as possible, being careful not to drill into the refrigerator box. I was able to get the spray foam tube to bend inside the hole so that I could direct the foam in several different directions. About half a can of foam was used in this area, which turned out to be too much as you see in this photo. To help relieve pressure exerted by the expanding foam, I would frequently remove the expelled foam and clean out the hole so that foam could continue overflowing. After the foam had fully cured, there was no indication that the cabinetry or the refrigerator box had been deformed.
Lastly, I accessed the area behind the freezer by removing the LPG solenoid switch and the two thermostats. I was able to use my iPhone to see into this area and direct the foam nozzle to where I wanted foam to go. About two cans of foam were used in this area, being careful to prevent it from pressing against the hull or refrigeration box.
After running the refrigerator/freezer for about 36 hours, it does appear to run a little less. We'll watch it later to see how effective this little project was.
Bow Anchor Rollers
 The original Delrin anchor rollers were cracking and chalking, so I searched high and low for replacement Delrin rollers. The originals were 3" diameter and 3" long with a 5/8" hole for a bushing and 1/2" bolt. All I could find were either longer than 3" or smaller in diamter, so I ordered two of these 3" black polyurethane rollers from Marine Depot (http://www.marinedepotdirect.com/amar/anchor-roller-replacement-wheels.html). At only $18 each, if the polyurethane doesn't last long I can afford to replace them after a short while.
More Graphics
 I read a forum post about a couple who had yellow canvas. They were easily recognized from a distance, and everyone remembered them by their colorful dodger and bimini. We're not quite that brave, but we do want to make it easier to see and remember C-Time's name. Carla ordered two more graphics, one for each side of the hull. Since we're not very likely to be passing a lot of other boaters, this will make it easier for them to see her name. These graphics were ordered from Speedy Signs (http://www.speedysigns.com/lettering/boat) and are fairly quick and easy to install. Carla has found them to be a lot less expensive than other sources.
Tank Level Indicator/Monitor
 The two holding tank float sensors had begun sticking such that they never would read correctly. Pounding my fist on the tanks to break the sender's float free didn't seem like the optimum solution. Also, the gauge panel's on/off switch wasn't working consistently, so I began looking for a replacement system. I like the idea of externally mounted sensors since they're not exposed to the waste inside the tank. When I read that the Profile Series monitor from Ferriello Sales could also receive signals from float-type sensors, I was sold. That meant that I could continue using the fuel tank and fresh water tank float sensors, and just replace the waste tank sensors with the foil type.
Notice I referred to this sweet little device as a monitor. As its name implies, it not only shows the levels in each of the various tanks, but it also alarms if one of the tanks goes to empty or full. The Profile Series 8-Tank monitor (http://www.ferriellosales.com/Monitoring_Systems.html) has received a lot of positive reviews on the forums, and I previously had good experience with their One Tank Solo Monitor.
The new externally mounted foil sensors have three wires that must be connected to the panel. Since the old float sensors only have two wires, I had to add a third wire.
 Mounting the Profile panel was extremely easy, as it fit perfectly in the cutout for the old Wema panel. Even the screw holes matched perfectly. I cut the old terminals off each of the wires at the panel and crimped on new eye terminals. For the new foil sensors, old ground wires were lifted from the ground terminal block and became new power wires between the panel and the foil sensors. All the wiring for the fuel and fresh water tank sensors remained unchanged.
After getting everything hooked up, a very simple-to-follow menu led me through the panel setup and calibration routine. Each of the tanks, with the exception of the fuel tank, was filled and emptied as part of the sensor calibration. When I was finished, the monitor worked flawlessly. All tank levels can now be read from the main screen, or more detailed information can be viewed on individual screens. Even though this system cost more than I wanted to spend for just two waste tank sensors, all tank monitoring is now more accurate and somewhat automatic. I highly recommend this vendor and the products he sells.
Diesel Generator Maintenance
 I removed the sound enclosure for the first time since about 11 months ago. Even though the generator only has about 18 hours on it so far, I figured I should check it out before we head off to the tropics. I found two issues with it, which are both probably pretty normal. First, the raw water pump belt was loose, likely due to initial run-in. This could have been a significant problem if allowed to continue. Our marina neighbor's generator raw water pump belt stripped all its teeth, causing the pump to stop pumping which resulted in the engine overheating and melting the rubber sound insulation. I'll be adding this belt to the list of things to check frequently.
The other issue was with the zinc. It has only been exposed to salt water for less than a year, but it was more than 2/3 gone. Fortunately I already had a replacement and will be placing an order for some more. So far I've been very pleased with the rebuilt Next Gen 3.5 kW generator.
Out With The Old . . .
We removed the last of the original fabric from the boat this weekend. The matching comforters, drapes, and headboard cover are gone. Here are the before (left) and after (right) shots.


Cockpit Lighting
 These LED lights were added under the arch as part of the security system. When the alarm is triggered, the lights flash in addition to the siren sounding. The lights can also be used as boarding lights for when we're leaving or arriving in the dark. A rocker switch on the port side of the steering pedestal bypasses the security system to turn the lights on for longer periods of time.
Interior Upholstery
Carla doesn't realize how much of a help she was on this project. While I cut and sewed, she ripped the seams of the old upholstery so that I could use them as a pattern for the new. We re-used the foam, bottom panels, and zippers and this also cut the project time and effort significantly. This project took two very long weekends to complete. I'll let the photos do the rest of the talking. Old on the left, new on the right.


 Well wouldn't you know it, we worked hard to finish it all and ended up being 1 yard short. We're probably going to special order 15 yards, so if anyone would like to use the same fabric please let us know as we'll sell you the extra 14 yards. Anyway, here's how it all looks finished.
Security System
 The thought of an uninvited guest boarding the boat either while we're away or while we're asleep is enough to cause us to want a security system. As usual, I searched and researched until I came across what I considered to be a reasonable system at an affordable price. The system is sold by Flagship Marine Security (http://www.boatalarm.com) and is found on vessels of all sizes. For obvious reasons I'm not going to share the details of our installation. However, I've found both the owner and the equipment to be top-notch professional. The remotely controlled system can integrate with deck sensors, motion detectors, magnetic sensors, photo-electric sensors, and vibration sensors. It can be controlled using a remote transmitter or a keypad, and the alarm can activate horns and/or lights. We also installed a dinghy/outboard disconnect switch that will warn if someone attempts to make off with "D-Time".
Lubricating In-Mast Furling

 While the wind was completely calm, it was a good time to lubricate the in-mast furling bearings and gears since it requires removing the sail from the furler.
 Various Canvas Projects
 Sometimes I get tired of working on the large projects and I need to just do something for fun. When we bought the folding wheel, the old pedestal cover took on a more "baggy" appearance. In this photo you can see the "new" slim-fitting cover after I custom fitted it to the new wheel.
The rail backrest cushions took about two hours to make. They're closed around the 1" pipe insulation using Velcro.
 The grill cover took about an hour. I love the small projects that I can get done in a short period of time.
No More NavPod Envy
 I had been shopping for quite a while for an instrument pod to permanently mount our Garmin 740s chartplotter. The configuration of the steering pedestal and the non-standard pedestal rails was going to make it difficult, expensive, or both. Searches on EBay didn't turn up anything that was more affordable. Realizing that the old Raymarine depth and GPS displays were redundant to the Garmin unit, I decided to remove those two displays and use the space in the pedestal for the chartplotter. You can see the original configuration in this photo. The externally mounted Garmin bracket just didn't look right, and it was troublesome having to mount and remove the chartplotter each time we wanted to take the boat out.
Being careful to keep track of all the interconnections between the Raymarine displays (depth, speed, GPS, autopilot), I detached the depth and speed from their transducers and from the SeaTalk network. When I found that the speed display no longer had power, I used a SeaTalk cable to connect the display to one of the SeaTalk jacks on the autopilot control. Still no power, so I started scratching my head and reading all the Raymarine literature. It should work, but it wasn't. Even though both SeaTalk jacks on the back of the autopilot control should be identical, I decided to swap the cable to the other jack. Voila, as they say.
 With everything working again, it was time to start the difficult task of cutting the opening. I started by using a coping saw and was able to cut two sides of the opening before the blade became dull. I didn't have another blade, but I remembered that the Dremel tool was still on board. Using a very small pointed bit, I was able to finish the two longer sides of the cutout. I wish I had thought of using the Dremel much earlier, as it was much easier than hacking away with the coping saw. The chartplotter fit perfectly in the opening and, as you tell from the "after" photo, looked a lot better in its permanent flush mount. I later covered the old holes on top of the pedestal.
Cockpit Enclosure
 When we purchased the boat, it already had a dodger and bimini that the previous owner's wife had made. Although she had done a very good job doing this complicated canvass work, it just didn't fit as tightly as it should. Before I started trying to attach other cavass to the existing bimini and dodger, I loosened all the connections and made adjustments to tighten first the bimini and dodger, then the connecting pieces. I was able to make everything tighter by moving zippers. Also, the binding that was used along the bottom edges was falling apart, so those pieces had to come off and be replaced with good fabric.
 After everything was adjusted into its final position, I stretched Dura Skrim patterning material (http://www.sailrite.com/Dura-Skrim-2-Patterning-Material-74) between the arch, bimini, dodger, and deck. This material has a weaving that resists stretching, so you can pull it tight without worrying about changes in shape. The patterning material is held in place using basting tape, also from Sailrite. Basting tape is a double-sided tape with a strong adhesive that sticks well to fabric and hard surfaces. You can lift the patterning material off the tape to stretch it, then reapply to the tape. This allows you to get the patterning material very smooth and taught (see photo). After the material is exactly like you want it, a Sharpie pen is used to make cut marks and to locate zippers. The use of good quality patterning material and basting tape makes creating patterns very easy.
 The next step was to trace the pattern onto the vinyl window material. I chose 30 Gauge Regalite, a laminated sheet glass, for its scratch resistance and durability. The edges of the window are framed by Sunbrella facing on each side of the window, varying in width from 1-1/4" to 4" depending on location. The facing can be purchased pre-made from Sailrite, or you can cut the fabric strips and run them through a facing maker, also available from Sailrite. The facing and zippers are preassembled to the window panel using basting tape to hold everything together.
 Once satisfied with the panel, the sewing can begin. The sewing machine I'm using is a Barracuda walking-foot machine similar to Sailrite's Ultrafeed LSZ-1. Carla bought this machine for me for Christmas and it is very powerful. I'm using a Teflon thread made by Helios which has a lifetime guarantee. Due to its slippery nature, sewing machines have a tendency to skip stiches. Although Sailrite had a couple suggestions how to avoid skipped stiches, I had to become a sewing machine technician to make an adjustment to the needle position. This significantly reduced the number of skipped stiches, and now it's actually fun to run 6 layers of heavy fabric and a layer of vinyl window material through this machine.
 With two panels complete, I took them to the boat and checked their fit. Not too bad for a first-timer, but I will have to tweak a few things to make it look more professional. The final step was to install the snaps. While stretching the panel in two directions with a hand and a foot, I drilled through the edge of the panel into the fiberglass deck. This guaranteed a perfect match of the male and female snaps. I used a countersink bit to slightly chamfer the hole, then used butyl tape around the snap screw threads (Note: The butyl tape is the same stuff I use to bed deck fittings, so I should never have a problem with water leaks). The female snaps are installed onto the panels using a special installation tool and a hammer. Dick, a friend at the marina, loaned me his squeezer that made installation of the last 30 snaps much easier. With all the snaps in place, it was time to stand back and admire the work.

 Unlike the windows, the bug screen material is very easy to work with. You don't have to worry about creasing or scratching it, it's much lighter which makes it easier to move around on the sewing table, and it stretches out the wrinkles easily. Where it took about 5 weeks to make and fit the windows, the screens only took about 3 weeks. When snaps are already installed on the boat, it's critical that the matching snaps be installed on the window or screen panels in exactly the correct location. If a snap is misplaced by 1/16" or more, it will be nearly impossible to connect that snap. Sailrite sells a snap positioning system (http://www.sailrite.com/Quick-Fit-Pin-Socket-Snap-Positioning-System) that makes it a "snap". Basically it's a snap with a sharp nail protruding. Just push the fabric onto the snap's nail and it marks the exact location where the snap needs to go.
Threw Away Throw Away Propane Bottles


 Storage space is at a premium on a cruising boat, so I'm constantly looking for ways to increase our storage efficiency. The small disposable gas grill propane bottles take up a lot of unnecessary space, are troublesome to attach to and remove from the grill, and are relatively expensive. I had seen kits to connect small gas appliances to large propane bottles, but they either had the wrong connectors or the hoses weren't long enough. I began looking for the individual parts and found the hose to be the most difficult to locate. Starting at the grill end, I purchased the special 1"x20 TPI Male X 1/4" Female NPT adapter online at http://www.tejassmokers.com/products/brassfittings.htm. The 8' hose is a Bayou Classic 7908 with 1/4" NMPT fitting on one end and 3/8" Female Flare Swivel fitting on the other end, and was purchased through Amazon. The small 1/4" NMPT hose fitting doesn't require as large a hole through the fiberglass bulkheads and deck as the other fittings. On the tank end, the hose flare swivel attaches to a 3/8" Male Flare T purchased from Lowes. The T attaches to the solenoid valve fitting using a 3/8" Swivel SAE Gas Flare Swivel Coupling Union that can be purchased at Lowes or online at Tejas Smokers. Note that I installed the T downstream of the solenoid valve. Finally, the hole through the deck is sealed with a Blue Sea Systems Cableclam. Total cost of this mod was about $65.
Hidden Bilge Mess

 I realize a lot of the maintenance items we're working on aren't nearly as exciting as modifications or additions to the boat, but hopefully these discussions and photos will be helpful to other 410 owners. Here is something that was very surprising to me, so much so that I almost posted an urgent request for information on the forums over the weekend. I had read on the forums about someone removing the house battery and shelf at the base of the companionway steps and finding some "primordial ooze", so I decided I should take a look. What I found was a solid layer of fibrous material that completely covered the keel bolt nuts (see the first photo). The material appeared to be the bottom of the bilge, making me think that the nuts had not been installed. When I probed into it, it felt like the black sheathing material that was used in house construction. I continued probing and realized that it was 15 years' worth of collected trash that had remained wet for all those years. Of course there was an odor associated with it. I removed more than two full hands worth (see the second photo) of this material, then spent an hour scrubbing and cleaning out that section of the bilge.
Racor Fuel Filter Vacuum Gage
 C-Time has a Racor 500FG fuel filter that's located behind the engine cover in the aft stateroom. I had no idea when the filter had last been changed or what its condition was, and I didn't like the idea of just running it until the engine started slowing. Based on some discussions on the forum, I purchased a vacuum gage (http://www.sailorssolutions.com/?page=ProductDetails&Item=VG01KT) that's ideally suited for this application and installed it at the same time as I replaced the filter. The gage comes with an adapter that fits the hole where the T-handle was previously located. I set the drag needle to zero and will check it periodically to track and trend the fuel system's vacuum pressure.
Mysterious Leaks
I've been trying to isolate a persistent leak and finally concluded that it was coming from the deck to hull joint at the stern. The leak manifested itself in a couple of ways. First, the pre-purchase survey revealed that the plywood gusset between the hull and the rudder post was completely rotted. We assumed this was just due to age, but it turned out to be due to the aforementioned leak working its way through the gaps between the gusset and the hull. The second indication of the leak was water collecting in the bilge, particularly when underway and the stern was under water. Finally, I was able to feel water streaming from a hole near the rudder post while underway.
First, the rotted gusset was cut out and a new piece of 3/4" marine-grade plywood was cut to fit. The new gusset's faces and edges were coated with resin to prevent future moisture absorption. Finally, the gusset was fiberglassed in place and painted to match the surrounding fiberglass. This gusset will likely outlive the rest of the boat.
First, the rotted gusset was cut out and a new piece of 3/4" marine-grade plywood was cut to fit. The new gusset's faces and edges were coated with resin to prevent future moisture absorption. Finally, the gusset was fiberglassed in place and painted to match the surrounding fiberglass. This gusset will likely outlive the rest of the boat.
 I attempted to remove the C-shaped rub rail, both mid-ship as well as at the stern, but found that there was a C-shaped molding under the rubrail which would have prevented direct access to the joint. I might could have tightened the through-bolts and closed the openings, but this approach seamed like too much work with an uncertain outcome. Instead, I used a Dremel tool with a small bit to cut away the connecting fiberglass between the deck and hull inside the two stern lockers. As you can see from the first photo (starboard side), I cut along the bottom where the fiberglass mat attached to the hull and at each end of the mat, then just pulled the mat loose from where it attached to the deck. I cut away a section about 3"x24" on the starboard side and about 3"x 18" on the port side.
 In the first photo you can see where there is some sealant being squeezed out of the joint, but large sections where there is no sealant being squeezed out. There also are dark areas on the hull fiberglass indicating that it had been exposed to sea water. The second photo is of the port side and there is no evidence of any sealant in this area. Virtually all the lower section, the part that is under water the most, has no squeeze-out. In looking at closeup photos of these areas, I could not see any sealant. This doesn't necessarily mean that no sealant was placed in the joint. The lack of visible sealant could be due to only a thin ribbon of sealant being placed there, or it could be due to a lack of compression of the joint resulting in no sealant being squeezed out toward the inside of the joint.
 The third photo shows the starboard side after applying 4200 to the inside of the joint. I first cleaned the joint with acetone to help dry it out, then used a caulk gun to shoot the 4200 deep into the joint. To ensure good adhesion, I used a finger to feather the 4200 onto the fiberglass. After the 4200 had cured for about 24 hours, I filled the aft fresh water tank to partially submerge the stern. The result was a completely dry bilge. Before glassing over the repair area, we took the boat out to fully submerge the joint and watched for any water accumulation in the bilge. (Note: All this work was done with my torso in the lockers and my legs laying across the swim step. I was not able to bodily fit inside the lockers and bend over enough to see the work area.) After confirming there were no leaks, I glassed over the exposed joint and painted to match. It's great having a dusty bilge.
Steering Shaft Bearings and Brake
 As we were bringing C-Time down from Deltaville, VA to Charleston, SC, I could tell that the steering bearings were starting to go bad. Greasing them didn't help, so I went about replacing them. There are good instructions on replacing the brake pad at http://www.edsonmarine.com/support/techsupport.php which includes removing the steering shaft. Both the sealed forward thrust bearing and the needle bearing housing were noticably worn. In case someone needs the part numbers for the bearings for a 1998 CDi Steering pedestal, they are:
Forward Thrust Bearing - 960-A-1712 ($52)
Needle Bearing - 960-A-140-1.1 ($40)
Needle Bearing Housing - 960-A-1640 ($65.50)
We also were not able to get the steering brake to hold the wheel, so I removed the steering column and found that crud was preventing the brake from fully clamping down on the column. I removed all components including the top needle bearing, cleaned them thoroughly, and then greased and reassembled everything. The brake worked great without having to buy another expensive replacement part.
We also were not able to get the steering brake to hold the wheel, so I removed the steering column and found that crud was preventing the brake from fully clamping down on the column. I removed all components including the top needle bearing, cleaned them thoroughly, and then greased and reassembled everything. The brake worked great without having to buy another expensive replacement part.

 While I had the top of the steering pedestal loose, I disassembled the single-lever engine controls to lubricate the internals. Once the shifter was placed into forward, advancing the throttle wasn't as easy as it should be. Upon reassembly, I found that the adjustment of the shifter arm was incorrect on the shifter cable, which forced the shifter and throttle cogs to press hard against each other. After readjusting the shifter arm, the throttle was must easier to advance.
Hunter Electrical Modification
 Apparently there have been some issues with overheating of DC circuits on Hunter boats due to improperly installed or excessive additional loads. As a result, Hunter provided instructions and materials to perform two different modifications to the electrical system. The first modification is the installation of 7.5A fuses between the "House" and "Start" batteries and the "Battery Test Switch". A fuse was already installed on C-Time for the "Start" battery, so only one of these fuses remained to be installed. The other modification installs 150A fuses between the battery selector switches and the isolation relay. When we purchased the boat, the instruction and materials were found onboard. The addition of the large fuses required mounting the fuse blocks behind the nav panel, lifting the terminals off the relay and landing those same terminals on the new fuse blocks, and finally installing the included short cables between the other side of the fuse blocks and the solenoid.
Refrigerator Improvements
We've made a couple improvements to our refrigerator/freezer, beginning with the replacement of the compressor. The old unit just gave up, so we purchased a new Adler/Barbour CU-200 compressor with plans to connect to the old evaporator. In order to connect the new compressor fittings to the old evaporator fittings, I would have had to have a custom connector fabricated (The Adler/Barbour quick connect adaptors wouldn't work with the old evaporator). So we ended up replacing the evaporator with an Adler Barbour VD-152. This combination has proven to be much more efficient than the old unit, only drawing about 4-1/2 amps and running about 50% of the time.
 The next improvement came when the thermostat that came with the new evaporator failed. I had already been looking at electronic thermostats, and this was just the excuse I needed to make the plunge. I bought and installed two Coastal MkII thermostats(http://www.coastalcoolaids.com/allproducts/thermostats.html), one for the refrigerator side and one for the freezer side. You can see the two thermostats mounted side-by-side in the lower right of the photo. Basically the freezer thermostat controls the compressor, and the refrigerator thermostat controls the spillover fan. The best thing about these thermostats is the digital thermometer. At a glance, you can tell within a tenth of a degree what the inside temperature is, and whether the compressor or the spillover fan is running.
The final issue to address was air leakage past the door seals. The seals are still very pliable, but they didn't expand against the refrigerator box and allowed air to pass. I "fattened" the seals by applying 1/8" wide 2-sided padded tape along the inside length of all the seals. This forces the seals to press tightly against the refrigerator box, thus creating a better seal.
SCUBA Tank Holders
 I finally got around to installing these two sets of plastic SCUBA tank mounts in the port cockpit locker. They are screwed to the hatch board and to the fiberglass liner. I placed them at an angle to aid in removal from the locker. The only complaint I have is that the rubber straps are heavy duty and difficult to stretch to fasten in place. Other that the one complaint, I think they're going to work out great. We'll also be able to store fins, masks, snorkels, BC's, and weights in the same locker. I had looked for a location that I could mount the tanks in a vertical position, but couldn't find any place that worked well. Considering the amount of trouble it will be to remove all the gear from the locker, load it into the dinghy, suit up, and then rinse and store all the gear, we'll probably do a lot more snorkeling than diving. At least we'll have the ability to SCUBA dive if we want.
 Opening Portlight Leaks
 The small opening portlights made by Lewmar were leaking during rains. The cause was a deteriorated material that joins the two exterior frame halves. A black multi-purpose silicone caulk from WM was used to replaced the old material.
  The process for filling the small crack between the frame halves was very much like all the other window work. First I applied masking tape around the repair location to prevent caulk from getting on everything. Then I overfilled the crack with the caulk and leveled it with a plastic screwdriver handle (I've learned that using my finger to level the caulk leaves too much of a depression). And finally, what I call the "Glory Work", I removed the tape to reveal a very neat caulk job.
Leaky Dinghy
 Our dinghy, "D-Time", has slowly been leaking air ever since we bought it. I found and repaired a leak around the valve that the previous owner replaced, but that only accounted for one of the tubes. While searching for spare dinghy parts (http://shop.inflatableboatparts.com/home.php) , I ran across a product called ToobSeal (http://www.bixlersmarine.com/Products/ToobSeal) that you squirt into each tube chamber and slosh around every 30 minutes for a few hours.
 The most difficult part of this task was removing the outer portion of the valve and holding onto the inside portion while squirting equal amounts of the ToobSeal into each chamber. Rather than purchasing the specialized tool for removing the valve, I just used a set of screwdrivers as shown in the photo and unscrewed the two valve halves. Of course this has to be done with the dinghy deflated. Using a knee to press against the back side of the interior valve half kept it from falling into the chamber. Immediately after filling each chamber, the valves are reassembled tightly, and then the fun begins. Although the instructions say to tilt the dinghy 45 degrees in each direction, we actually turned the dinghy 360 degrees in each direction. Since the purpose of the sealant is to coat the inside of the tubes, it makes sense to coat ALL of the interior surfaces. During the 5 months of cruising in the tropics, I averaged adding air about once a month, so the ToobSeal worked great.
LED Lighting
 Like most everyone else, I had priced LED bulbs and found them to be outrageous. Then, I performed an EBay search and found very cheap bulbs from China. Not wanting to risk a lot of money, I ordered 5 bulbs as a trial. They arrived as promised in about 3 weeks and worked great, so I ordered another 15 bulbs. Each bulb consists of 12 warm white LED's mounted on a G4 wafer, and electrical circuits on the back that allow the bulb to be powered by 10-30 Volts D/C. The higher voltage rating ensures that the ship's battery charging current doesn't shorten the life of the bulbs. I now see that there are some of the bulbs shipping from U.S. sellers for about the same price (roughly $3-$4 each). With about 20 of these bulbs on board, the power savings can be substantial. The photo is an LED light fixture that I added on the port side of the master berth (Standard in the 3-cabin version of the Hunter 410).
We've also replaced the two Running Lights bulbs with LED lights, but these were much more expensive. They are a festoon type bulb, with several LED's mounted around them. The cool white appears bright enough, and the green and red colors of the lens are still distinguishable.
Anchor Chain Paint
 Since we hadn't had all the anchor chains and rodes out of the anchor locker, I decided to see what was down there. The previous owner's marina had many pine trees near the slips, so a lot of pine needles and other wood matter was in the bottom of the anchor locker. This material was certainly stopping up the lowest drain to some extent, so being able to remove that material made the task worth the effort. While the anchor chain was out of the locker, I marked it with red spray paint at 25', 50', 75', and 97'. The photo shows the marks at 25' and 75'. The system I'm using is 2 painted links for 25', 5 painted links for 50', 7 painted links for 75', and 3 intermittent painted links for 97'.
Waste Hose Replacement
This actually was one of the first things we did to the boat. The hoses, including the vent hoses, were completely permeated and really stunk up the boat. I had previously read Peggy Hall's recommendations on replacement hoses, and had even used the Trident 102 (white) hose on our last boat. The problem with the Trident 102 hose is that it smells strongly of rubber compounds, so this time I decided to use the black Trident 101. The smell wasn't nearly as bad, and the hoses are virtually identical except for color. The store at Hunterowners.com now carries the Trident 101 in 1" and 1-1/2" diameters.
This is some heavy duty hose, so it can be difficult to make tight bends. It would have been easier to run the new hose by butting the ends of the new to the old and using the old hose as a guide. However, I removed the old hoses first so that I could measure and cut the new hoses outside. This made running the new hoses a difficult and sweaty job, but not impossible.
I've found out that a single hose clamp can pinch the hose in a way to allow it to leak. So, even above the water line, I always use two hoseclamps turned 180 degrees from each other. It's also a good idea to go back after a couple weeks and retighten all hose clamps as the hose relaxes.
Lifelines
 Like any 13 year-old boat, the PVC coating on our lifelines has begun to crack. With rust stains starting to show up at each crack and at the end fittings, I decided we needed to address this issue before heading to the tropics. After much reading on the subject, I realized that the PVC coating on lifelines greatly reduces their effective life. Although bare stainless lines may not be as attractive as PVC coated, they certainly are more cost effective and just as functional. I decided to try removing the coating from some of the lines to see how I liked the look of bare stainless, and I was quite surprised at how extensive the rusting problem was. Not only was there rust at every crack in the coating, but there was also signs of rust in long sections of cable where there was no coating cracks. Fortunately, it appears that I caught the problem early enough that there is no failure of the wire strands.
  We've decided to try to just keep the lifelines we have, so we made an attempt at removing the rust. We used a product called Spotless Stainless (http://www.spotlessstainless.com) that is supposed to remove the rust with a minimal amount of work. Because the metal must remain wet for 30 minutes, we laid them out on Seran wrap, brushed on the Spotless Stainless, then closed the wrap to prevent it from drying. After 30 minutes, we removed the wrap and thoroughly rinsed the lifelines. The Spotless Stainless definitely made the lifelines look better, but it did not remove all the rust. So, we now have bare stainless, rusty, 7x7 lifelines. Note that if you're going to install bare stainless lifelines, you'll likely use what's called 1x19 cable. This cable is smoother and more attractive than the 7x7 used for PVC coated cable. For now we'll just leave them as-is. They should last longer than our cruising adventure.
Diesel Generator
Before going to the Annapolis Sailboat Show, I shopped online for diesel generators. Of course, like all boat systems, it had to meet a number of criteria; 1) Support the larger of the two A/C units, 2) Low fuel consumption, 3) quiet, 4) affordable, and 5) fit in the designated space in the starboard stern locker. The Next Gen (http://www.nextgenerationpower.com/)3.5 kW unit met all the criteria, but we went to the show looking for the best all-around generator, and of course good deals. After visiting all the vendors' booths, we returned to the Next Gen booth to place our order. The representative said he had tried to find us the day before to let us know that the company had several remanufactured units available. At a substantially reduced price, we certainly couldn't pass on that opportunity.
The early models of the Hunter 410 were built with a platform to accommodate a Northern Lights generator, I believe. The owner's manual shows an optional generator and connections to the electrical, fuel, and plumbing systems. Our boat had a spare set of cables running from the stern to the electrical panel, an extra set of fuel tank fittings with valves, and a molded-in exhaust tube. All this made installation much easier than if we had to start from scratch.

 To place the generator into the stern locker, you first remove the locker surround. This opens things up so that you can just slide the generator through the hole. The generator is relatively light, so if the boat is backed into the slip this can actually be a one-man job with the aid of 1x4 skids.
The exhaust tube that's molded into the hull does not have the hole punched through, so I had to purchase a drill extension and a hole saw that would fit perfectly inside the tube. The cordless drill punched easily through the hull, and the bit formed a fairly smooth hole. Ideally, I would have wanted to finish drilling the hole from the outside, using the pilot hole as a guide, but this was not feasible while the boat was in the water.
To complete the installation, a number of components must be purchased and installed. Two fuel filters, and supply and return lines must be installed between the main fuel tank and the generator. An exhaust hose with water lift must be connected to the boat's exhaust tube, and adaptors and elbows may be required depending on its routing. For the raw water supply I elected to use an existing thru-hull, which required combining the aft head sink drain and aft head raw water supply into one thru-hull. On the electrical side, I used 6-gauge cables for the starting battery and the existing 8-gauge cables for connection to the AC electrical panel. And finally, the generator came with a starting switch and hour meter that was mounted at the nav station.
We've used the system at anchor to run the A/C unit and are very pleased with it. The 3.5 kW unit will allow us to run up to 30 amps of load, although I think it will be happier if we limit it to about 25 amps. Some people question the value of a generator, but now we'll be able to run the water maker, washer/dryer combo, two A/C units, water heater, microwave, battery charger, TV's, and other miscellaneous chargers. For the smaller loads, I've also installed the Xantrex 2 kW ProWatt SW (pure sinewave) inverter (http://www.xantrex.com/power-products/power-inverters/prowatt-sw.aspx) with a transfer switch.
Lofty Projects
So far, Carla has surprised me by being able to hoist me up the mast several times. Although I try to consolidate trips up the mast as much as possible, I'm never prepared to accomplish all tasks at the same time. This one photo shows several projects that required elevated work. The first trip was to replace the Ratheon radar radome with a new 18" Garmin HD system. This required removing the old cable and radome, pulling new cable, and installing the Garmin unit. Fortunately, the Ratheon mount fit the Garmin radome, so additional drilling into the mast wasn’t necessary. While working on the radar system, we also installed a radar reflector that we picked up cheap on EBay. The next trip up was to install a wind instrument. We chose to purchase the Garmin instrument and tie it into our existing Garmin 740S chartplotter. This saved some money, but has the disadvantage of lacking a dedicated display for wind information.
The next trip up the mast was to install the Single Sideband (SSB) High Frequency radio antenna. Because we don’t have a backstay, our options included a very tall whip antenna, a halyard rope antenna, or a GAM Split Lead antenna. We chose the latter after reading numerous discussion posts, and after comparing the logistics of daily use. Also, the port sidestay terminates very near the nav station, so it was convenient to run the antenna lead to the antenna tuner. We installed the antenna in fairly cool weather, and the split plastic housing was stiff and difficult to fit over the sidestay. It also had to traverse two spreaders, which makes it look a little awkward. See my discussion of
the antenna’s performance later in the SSB installation section.
the antenna’s performance later in the SSB installation section.
Little Stuff
 Although hatch boards are a very effective method for locking the boat and keeping water out, they are a real pain to remove or step over everytime you need to go in and out. Just like on our last boat , we wanted hatch doors, but I didn’t want the hassle of varnishing wood doors. This time I made the doors out of ¾" Starboard and 1/8" tinted Plexiglass. I was unable to find inexpensive stainless steel hinges that would separate, so I purchased the expensive ones from WM (See my writeup later on WM). I was very happy to find some small spring-loaded stainless catches to hold the doors open. The most difficult part of this project was creating a slot to slide the Plexiglass through. For the interior perimeter, I used a thin-kerf router bit to cut a 1/8" slot. For the slot to insert the Plexi, I laid the door on its edge on the table saw and raised the blade into the Starboard.
Storage
 There's a lot of storage on a Hunter 410, but when planning to live aboard for an indefinite period of time, you tend to want more storage than is available. I found good storage areas under the floorboards in the aft cabin, but there was no easy access. With the table saw, I raised the blade into the floorboards and cut out a one foot square opening. After trimming down the square plank that was cut out, I trimmed both the hole and the hatch with teak. Some wood blocks get screwed to the underside of the floors to support the hatches. These two storage areas probably total about 4 cubic feet.
 Our Favorite Marine Supply Store
WM gets a lot of bad press regarding their high prices. I would tend to agree that their prices are usually higher than I can find elsewhere on the WEB. However, I also realize that they provide a very comfortable and well-stock environment in which to hold and touch a wide variety of boating products. There have been many times that I showed up at the boat without all the necessary hardware to complete a project, and WM has been there to save the weekend. I dare say that over the course of the last two years, I've averaged at least one trip to WM every weekend.Most recently, I've found their prices to be very competitive on some select high-dollar items. What really helps to make their prices competitive is the club rewards program, at $10 back for every $250 spent. This weekend, you can get triple reward points on purchases. Additionally, you can frequently find a 10% or 20% Off coupon at the boatshows or in the magazines. Recently, I've found their prices on Manson Supreme anchors and Icom SSB radios to be very low compared to other retailers. If I'm going to spend money, then I look at WM first.
Hull Repair
 As you can see in this photo, there is a hairline crack and a chip missing in the edge of the portlight hole of the hull. This apparently allowed water to migrate into the balsa core below it and soften this portion of the hull. I used a Dremel tool to open up the entire bottom edge of this hole, then used a hooked coat hanger wire to dig out the soft balsa. The affected area ended up being about 1 square foot. Once I had the soft stuff out, I poured resin into the hull using a syringe, filling the entire void. After the resin cured, I smoothed the area with filler and then painted.
 We knew from the pre-purchase survey that the rudder was almost totally delaminated. Rather than trying to salvage the rudder, we elected to replace it with a new one from Foss Foam (http://newrudders.com/). Believing that the rudders were neutrally bouyant, I had contemplated performing this task in the water. Deciding to do it on the hard was the right decision, as you'll come to understand after reading further. Replacing the rudder on the hard required blocking the boat an extra 3'-4' in the air. This in turn made buffing and waxing the hull much more difficult due to the height of the boat.
 The first step prior to removing the rudder was to remove the quadrant. On this boat, the two quadrant halves are clamped together using 4 small bolts threaded into the larger half. There is a single large bolt that passes through the smaller half, through the shaft, and threads into the larger half. This bolt in particular was very difficult to remove and required the use of a breaker bar. Once the quadrant was removed, the rudder was held up by friction within the bearing.
 This is the old rudder shaft. You can see that it tapers to a large OD near the rudder. The shaft is primarily composite with stainless bearing surfaces. It came out very easily with the aid of gravity, but would have probably been a little more difficult if the boat were in the water. I've read about rudders breaking off in the ocean, and I would imagine those rudders are similar in design to this composite shaft rudder.
  In this photo you can see that the new shaft is not tapered, and so a new bearing is supplied to fill the space between the smaller shaft diameter and the old bearing ID. You can also see that the new shaft is all stainless pipe with a hollow bore. The shaft is VERY heavy, and I suspect that I never would have been able to get the rudder into the right orientation in the water, as the rudder itself would try to float and the shaft would try to sink.
 This is the new bearing that is supplied with the new rudder. I was just doing a trial fit of the new bearing on the shaft. I subsequently had to remove the bearing so that it could be installed in the old bearing. The bearing had a fairly tight fit, which I'm sure is better than a loose fit.
  Here's a view of the new bearing pressed into the old bearing on the bottom of the boat. The new bearing is held in place using resin between the new and old bearings. The new rudder shaft was very difficult to slide into the new bearing. I ended up using a car jack to apply upward force while I turned the rudder.
With the installation complete, the new rudder caused a little stiffness in the steering, but it eventually wore-in to a perfect fit. I'm very pleased with the quality of the rudder. The guys at Foss Foam are doing an excellent job of improving on the original rudders.
Inaccurate HVAC Thermostat
 This one turned out to be an easy fix. The HVAC control panel is mounted on the side of the galley peninsula, and never did provide an accurate indication of the ambient temperature. As a result, the thermostat would not control the temperature very well. It turns out that someone installed an alternate air temperature sensor and placed it inside the compartment where the HVAC unit is located (See arrow in photo). By simply disconnecting this alternate sensor, the thermostat now reads accurately and does a much better job of controlling temperature.
Wind Turbine Generator
 Several months ago we were able to purchase an AirX wind generator off Ebay. The package included the mast, the support struts, and all the hardware necessary to erect the generator. Since this is a 400 Watt generator and the distance from the batteries is about 25', we used 6 AWG cable. This is a direct connection to the battery through a 40 Amp fuse. After initially hearing the whirring noise at high rpm's, I decided to replace the bearings and clean up the blades. New bearings were purchased from eMarineInc, and I happened up on some new blades that an individual had never installed. Bearing replacement is accomplished by separating the generator body halves, removing the internal snap ring holding the bearings in place, pushing the rotor out of the housing, then pressing the two bearings out the front of the housing. I was able to accomplish this without disconnecting the stator wiring inside the housing. I also sanded the blades smooth, checked each blade's weight, and carefully measured the tip-to-tip distances as I installed them on the hub. The result of all this effort is a slightly quieter sound, but the whirring is still noticable in the aft stateroom.
Solar Panel & Dinghy Davits
 As Carla posted on the front page, we also installed a solar panel. This 245 Watt Kyocera panel was purchased from eMarineInc (www.emarineinc.com), along with the 1" stainless tubing, mounting hardware and MC4 connectors. EMarineInc has good prices on most items, their technical knowledge is invaluable, and they also have the special connectors and mounts that may be difficult to find elsewhere. We're using a Blue Sky Solar Boost 3000i MPPT charge controller, tied directly to the batteries through a 40 Amp fuse. This is a new controller from Blue Sky that can handle the higher voltage from these 60-Cell panels and has a built-in battery equalization function. A Blue Sky IPN Remote Display is mounted at the NAV station to indicate charge status, battery voltage, and current being sent to the batteries. Again, due to the 25' run to the batteries, we used 6 AWG cable. This oversized cable will have minimal voltage drop.
 I had planned from the beginning to mount the panel on the dinghy davits, so the davits had to meet certain criteria. You can see from the photos that rather than purchasing Martek's (www.martekdavits.com) stabilizer solution, I used additional 1" tubing and fittings to form triangular supports to brace the davits laterally. Also, rather than relying on the stern rail to support all that weight, I tied the davits into the arch for extra support. To raise the davits high enough, I used Martek's 12" extensions. This system is very strong and sturdy and looks good. I definitely saved money by building up the braces and mounts using tubing rather than manufactured solutions. By the way, all the tubing fittings were purchased from Marine Part Depot (www.marinepartdepot.com). I find their prices on stainless fittings to be lower than anywhere else.
 Washer/Dryer Combo
 We chose the sitting area in the aft stateroom as the location for our washer/dryer unit. This seems to be the best location since it's near fresh water tubing, through-hulls, and 110V power. I knew that I didn't want the unit to protrude too far into the area, so I searched all over for the shallowest combo available. The only ones I found that were about 18" deep were the old Splendide units with Combo-Matic in the name. There are two of them, with model numbers WDC5200 and WDC1024M. These are available as boats and RV's are parted out or refurbished. Both of these models have a ventless dryer, so you don't have to route a large vent overboard.
 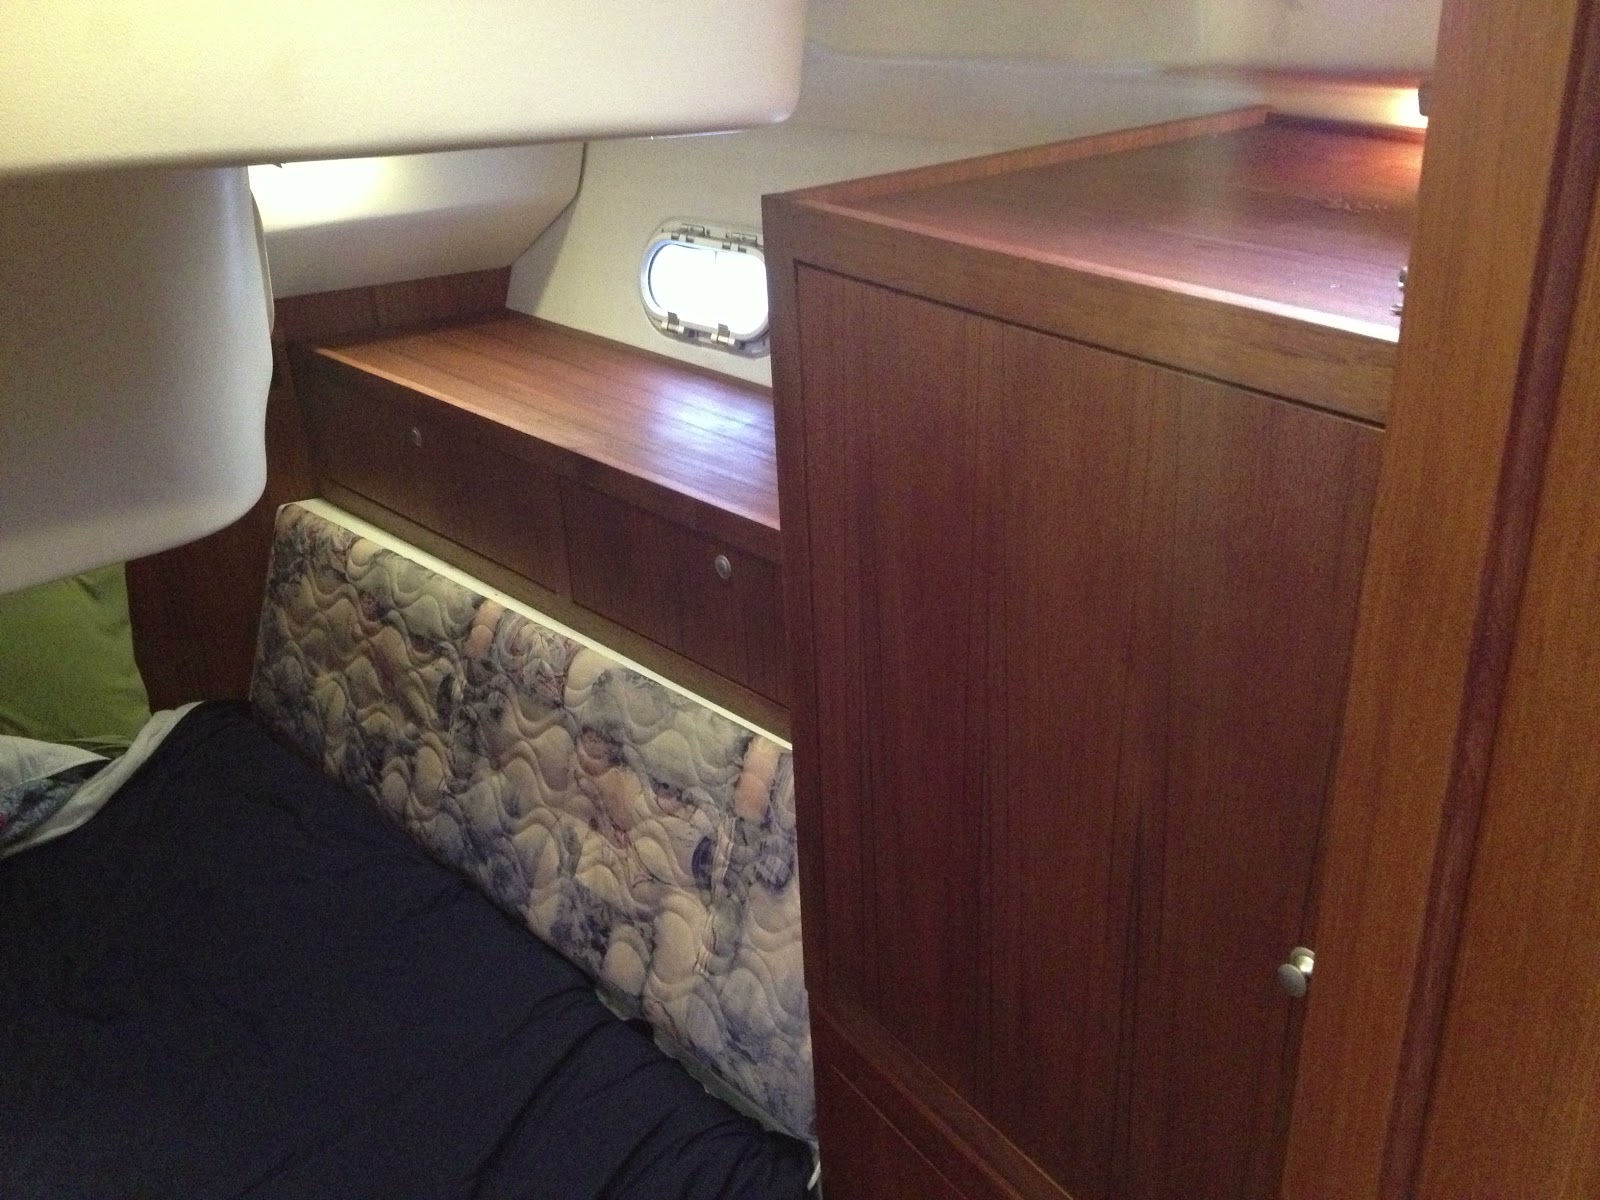 Once I removed the overhead cabinet and seat, I realized that the overhead cabinet would make a great storage area under the washer/dryer. I cut the old seat down to the size of the opening, screwed a few more support strips around the perimeter, and set the old seat in to form a platform. I built up a full enclosure cabinet out of solid teak and veneer plywood to hide the unit, and also built another cabinet on top of the existing plastic storage. By the way, it's amazing how many uses you can find for wood pieces that are removed during these mods. See later where I used the mirror frame and part of the seat back to cover the hole for the old SSB radio.
Single Sideband (SSB) Radio
Being the penny-pincher that I am, I would prefer to lay out a ton of money initially than to have to pay a continuing fee. That really is the driving factor in my decision to go with SSB rather than satellite phone for connectivity when away from Wi-FI. From what I've read, the initial installation cost of each is roughly the same if you're looking for regular email capability. Since SSB offers certain advantages, such as communicating on a "party line" with fellow cruisers and cruising nets, it seemed to be the clear choice for us. Here is our SSB saga in detail: Again, being the penny pincher that I am, I had shopped for used radios for a while. When I ran across an ICOM m710, Pactor II modem, and AT-130 antenna tuner for a package price of $1500 on EBay, I jumped on it. The description said, "Works great". That wording should have been a clue that the owner didn't really know anything about marine or HAM radios. But for $1500, I felt it was worth the risk. The radio was much larger than I was expecting. This thing is about 4 times larger than a VHF radio, so I had to cut a large hole in the nav station area in which to squeeze this monster. I placed the tuner below the floorboard beneath the nav station, and the modem fit nicely inside the nav station desk. The first tests indicated that the radio received and transmitted pretty well. I was even able to transmit and receive test emails. However, I later realized that there were a few things wrong. First, I wasn't sure the tuner was tuning, so I purchased a cheap SWR meter and connected it between the radio and tuner. The SWR level was more than 3, and you really want something less than about 1-1/2 or 2. Secondly, the power being drawn from the boat's DC panel wasn't as high as I expected. This would indicate that the radio wasn't transmitting at full power. After getting virtually no information from the previous owner, I shipped the radio and tuner off to a certified ICOM repair facility. They performed a basic bench test and found that the radio was not generating a carrier signal, and it was overmodulating. Repairs would START with replacing all the power amplifier transistors at a cost of $450. Following those repairs, they would be able to resume troubleshooting the tuning issues. At their advice, I decided to scrap the radio and get another one. In the end, I basically paid $1500 for the tuner and modem, which isn't really a bad deal considering modems cost more than $1000. Being unable to find a new ICOM m710, we decided to go ahead and purchase the most up-to-date radio, an ICOM M802. This radio comes in 3 pieces; the transmitter, a control panel, and a speaker.
  Separate components allows for options in mounting. So, after having cut a huge hole in the nice wood panel for the 710, I covered the hole and mounted the control head overhead on the shelf above the nav station. The large hole in the wood panel made mounting of the transceiver behind the panel easier, so I guess that wasn't a total waste. The speaker fit easily in the corner of the nav station desk. By the way, the cover for the hole was made from the mirror frame and seat that was removed from the aft stateroom.
I completed the installation just in time to participate in the Waterway Net, and my signal was reported as 5x2 (meaning my signal was strong, but voice was barely understandable). Another operator near me had a much better signal at less power, so something was wrong. The other operator, Tom, offered to come by the boat and look our "rig" over. The first thing he saw was that I had coiled the excess antenna lead and placed it near the tuner. Secondly, the antenna lead travelled a long distance to the antenna, passing near power and data cables. His advice was to relocate the tuner much closer to the antenna, and cut off the excess lead cable. The problem is that antenna lead is not like coax cable, it doesn't have an outer shield to contain radio frequency (RF) waves. It's merely an electrical insulator to keep you from getting RF burns. Therefore, the coiled and long lead was actually part of the antenna, sending RF into all the adjacent cables and electronics.
 After relocating the tuner as close to the antenna as possible, and shortening the antenna lead, my signal was reported as a much stronger 5x5. Thanks Tom for the advice and assistance. Initially I was using a non-conventional RF ground. The KISS Ground Plane system has gotten mixed reviews, but it's a much simpler installation than the traditional grounding systems that make direct contact with the surrounding water. I was satisfied that it was working well, but it turns out there's an easier and cheaper way. According to the ICOM installation manual, a 3"-4" wide copper ground strap connected to a keel bolt is one of the best grounding systems. The traditional belief that contact with the water is necessary is no longer supported by ICOM. Even a fiberglass-coated lead keel will couple with the surrounding water through capacitance, and that's all you need. So,
 I decided to bite the bullet and install a copper foil ground strap rather than use the KISS Ground Plane system. On the Hunter 410, the Nav station lies right next to the bilge, so it was very convenient to run the strap along the hull from the area behind the nav panel, below the floorboards, and down into the bilge. The run was about 11', so I have about 35' of copper foil left if anyone is interested. There is an area below the nav table where I was not able to fully hide the copper, but it's not extremely noticable. The connection to the keel bolt was made by first wire brushing the contaminants from the bolt, then wrapping the copper foil around the bolt. The foil is held in place by a stainless hose clamp.
Water Maker
When I first started looking at water makers, I was disappointed in the high prices. I was not willing to pay thousands of dollars just to avoid paying for water in the Bahamas. While at the Annapolis Sailboat show, I was pleasantly surprised to run across DIY Watermakers (www.diywatermakers.com). The prices they were advertising were about half of everyone else's that I had seen. I spent some time talking with Raymond, then later exchanged several emails. I researched the technical aspects of water makers, then asked Raymond some more questions. After satisfying myself that he knew what he was doing, that he had good reasons for his approach, and after contacting one of his customers, I placed an order for the A/C version of the 30 gallon-per-hour unit.
Suspicious of the extremely low price, and not finding any online reviews of the system, I entered into this project expecting certain challenges. To their credit, the company has corrected some of my issues while I was busy installing my system.
The first run of the system yielded product water with approximately 130 ppm solids, indicating that I had a leak past an O-Ring. I disassembled both high pressure housings and generously lubricated the O-Rings to prevent them from becoming displaced during assembly. The second run of the system resulted in 40 ppm solids and a flow rate in excess of the advertised 30 gpm. I’m certainly very pleased with these numbers AND with the price. Although there were a few hiccups with my installation, future clients will likely not be faced with the same challenges.
 The raw water strainer, boost pump, primary filters, and charcoal filter fit pretty well under the forward berth in the holding tank area. I combined the head raw water and sink drain on one thru-hull, and used the other thru-hull for the water maker raw water. Combining the head and sink on the same thru-hull allows for filling the head with fresh water from the sink faucet. You can see from the photo that this area is becoming quite crowded. However, use of this space prevented usable space elsewhere from being taken. An added advantage of locating the filters here is that when I change out the filters, the inevitable spills will go straight to the bilge without making a mess on anything that matters.

 The high pressure pump and two RO membranes fit neatly under the U-shaped seatee. I placed the flow control valve and pressure gauge near the same panel used for accessing the fresh water tank valves. The water maker product water discharge ties into the boat's water system between the tank selector valves and fresh water pump. That allows us to direct the water maker's product water to any of the three water tanks.


 A sample line is run to the galley sink. I purchased a plain sink spout with no valve and mounted it at the galley sink. The 1/8" plastic tubing fits inside the spout, so there was no need for a connector between the tubing and the spout. I was able to just push the tubing all the way through the spout until it almost protruded from the end. This will provide an easily accessible location to check the clarity of the product, as well as test the water with a separate hand-held TDS meter. The installed flowmeter and in-line TDS meter are located under the dinette seat next to the tank selector valves.
This has been a project that spanned several weekends, but the long duration was my fault. I spent a lot of time trying to decide the best location for all the components, and how to configure them for the most efficient assembly. If I were doing it again, it would probably take no longer than a good weekend.
 The raw water strainer, boost pump, primary filters, and charcoal filter fit pretty well under the forward berth in the holding tank area. I combined the head raw water and sink drain on one thru-hull, and used the other thru-hull for the water maker raw water. Combining the head and sink on the same thru-hull allows for filling the head with fresh water from the sink faucet. You can see from the photo that this area is becoming quite crowded. However, use of this space prevented usable space elsewhere from being taken. An added advantage of locating the filters here is that when I change out the filters, the inevitable spills will go straight to the bilge without making a mess on anything that matters.
 The high pressure pump and two RO membranes fit neatly under the U-shaped seatee. I placed the flow control valve and pressure gauge near the same panel used for accessing the fresh water tank valves. The water maker product water discharge ties into the boat's water system between the tank selector valves and fresh water pump. That allows us to direct the water maker's product water to any of the three water tanks.

 A sample line is run to the galley sink. I purchased a plain sink spout with no valve and mounted it at the galley sink. The 1/8" plastic tubing fits inside the spout, so there was no need for a connector between the tubing and the spout. I was able to just push the tubing all the way through the spout until it almost protruded from the end. This will provide an easily accessible location to check the clarity of the product, as well as test the water with a separate hand-held TDS meter. The installed flowmeter and in-line TDS meter are located under the dinette seat next to the tank selector valves.
This has been a project that spanned several weekends, but the long duration was my fault. I spent a lot of time trying to decide the best location for all the components, and how to configure them for the most efficient assembly. If I were doing it again, it would probably take no longer than a good weekend.
WiFi and TV Antennas
When we first slipped a boat at our current marina, the WiFi connection was very good since we were close to the antenna. However, as we traded up in boat size and moved to the larger slips further from the antenna, the connection became non-existent. We frequently needed reliable connections, so we added hotspot capability to my iPhone. This has worked great for the last 12 months, but our plan is to drop the data plan from the iPhone when we leave the U.S., so the iPhone hotspot will not be available. After reading about the abundant availability of WiFi connections in the Bahamas and Caribbean, we decided we needed a WiFi antenna that would help us reach out and connect.
After researching the options and reading the reviews, we settled on the IslandTime PC Marine WiFi solution (http://islandtimepc.com/). This unit brings together Ubiquiti's Bullet M2HP radio, the latest at the current time, with an 8db gain antenna. We also purchased their wireless router which basically forms its own hotspot so that we can connect wirelessly with the laptop, iPhone, and iPad.
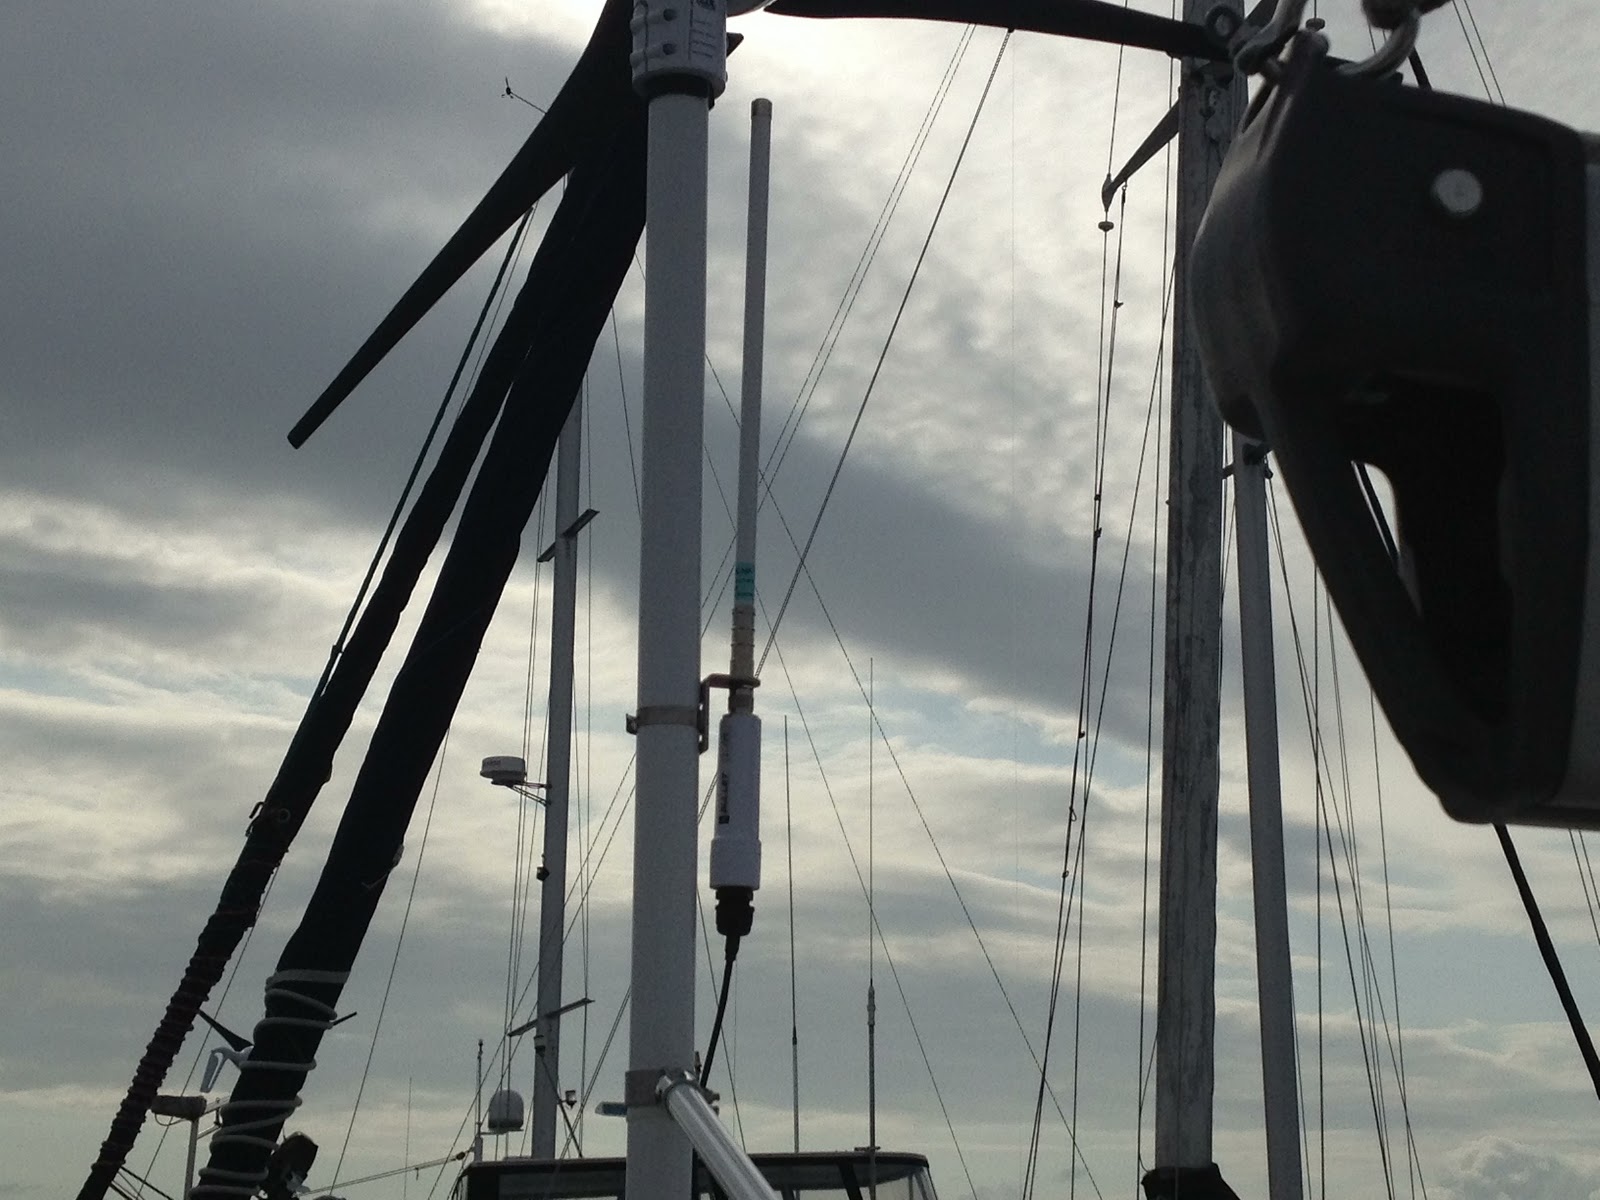 Installation was as simple as installing any other device that requires pulling cable through tight spaces. The antenna mounts neatly on the wind turbine generator mast, and the POE (a device that injects 12 volts DC into the antenna's ethernet line) and wireless router mount near the Nav station. There is a single ethernet cable connecting the antenna to the POE, and a short ethernet cable connects the POE to the router. A DC cable is wired to the DC panel through a breaker.
 As you know by now, I like to share LESSONS LEARNED, and this time is no different. When pulling wire through conduit, I tie the string around the cable, then use electrical tape to hold everything together tightly. What I found this time was that the electrical tape deformed the small dividers on the ethernet plug, causing them to not seat squarely in the POE jack. It took a couple hours to figure this out, but once corrected everything worked perfectly. The instructions were easy to follow, and the system worked great right out of the box. We actually were able to just barely stream Netflix from our previously inaccessible marina WiFi connection.
The second photo shows the new TV antenna mounted on top of the mast. You can read about how Carla hoisted me up the mast three times in two days on her pages. The result of all this effort is that the 10" Glomex antenna with amplifier provides better signal reception.
Fuel Can Holders
 I wanted to use a material that would last a long time and would look nice too. I'm told that marine wood workers frequently use Iroko, aka African Teak, for boat building. It's about one-fourth the price of teak, and still stands up to the harsh marine environment. I purchased an 8"-inch wide board from my local woodworking shop and promptly ripped it into these two boards. Although the wide board was nice and straight, the internal stresses manifest themselves into two very curvy boards. I took advantage of the curves by placing the boards to match the curve of C-Time's hull shape. After applying six coats of varnish, I mounted them to the stantions using stainless U-Bolts. Now we just need to purchase a bunch of diesel fuel cans and strap them to the holders.
Engine Cover Gasket
 The original equipment gasket for the engine cover is a two part gasket comprised of an extruded rubber bulb glued to a U-shaped, metal-reinforced pinch-type gasket. The old gasket was starting to come apart, so I ordered a new one from the store at Hunterowners.com. I would never have been able to find such a specialized gasket on my own. Replacement was simple, and I'm sure it will last a good long time.
 Centerline King Berth In A Hunter 410
 The Hunter 410's aft stateroom layout showed an athwartships queen berth, with the longest dimension being more than 7'. Although this bed is adequate in size, Carla and I really wanted a centerline berth, meaning that you lay lengthwise with the boat. We were unable to find a centerline queen in a boat that suited us. Instead, I glued up several thicknesses of foam and placed the resulting foam block beside the bed. This gives us about 6'-3" of centerline length and more than enough shoulder room. When I need to get to the shaft packing or muffler, I just move the foam out of the way. Something else that must be considered is condensation under the mattress. We purchased and installed a product called DryMesh (
http://www.drymesh.net/) that only cost about $70 and has worked very well for us.
The Hunter 410's aft stateroom layout showed an athwartships queen berth, with the longest dimension being more than 7'. Although this bed is adequate in size, Carla and I really wanted a centerline berth, meaning that you lay lengthwise with the boat. We were unable to find a centerline queen in a boat that suited us. Instead, I glued up several thicknesses of foam and placed the resulting foam block beside the bed. This gives us about 6'-3" of centerline length and more than enough shoulder room. When I need to get to the shaft packing or muffler, I just move the foam out of the way. Something else that must be considered is condensation under the mattress. We purchased and installed a product called DryMesh (
http://www.drymesh.net/) that only cost about $70 and has worked very well for us. Even More Storage
 In the forward galley storage cabinet, a large portion of the area is taken up by a wooden box enclosing plumbing hoses. When I removed the box, I found that the box could have been smaller, while still providing adequate space for the hoses. After cutting the box down to a smaller size, an additional 5" of space was created. You can see the outline of the old box's footprint in the photo. This may not sound like a lot compared to land-based kitchen storage, but it's a great improvement on a boat. The best part of modifications like this are that they cost nothing but time.
 The garbage can that Hunter used was very small, so I had been looking for an alternate location without success. I saw that there was a large amount of room around the can that was being wasted, so I set out to find a larger can that would fit in that area. While at Lowes one weekend, I found a larger can that would fit in the hole in the Corian countertop. There are two plastic rings that have to be removed, but the height of the can is such that it is held in place by the countertop, and the can supports the cover at just the right height. I wanted a slightly more dressy appearance, so I cut the top plastic ring to fit the can, then screwed it back on the underside of the countertop. The final installation looks a little better than the photo I've shown here. Another several cubic inches of garbage space added at a cost of a little more than $5.
Anchors
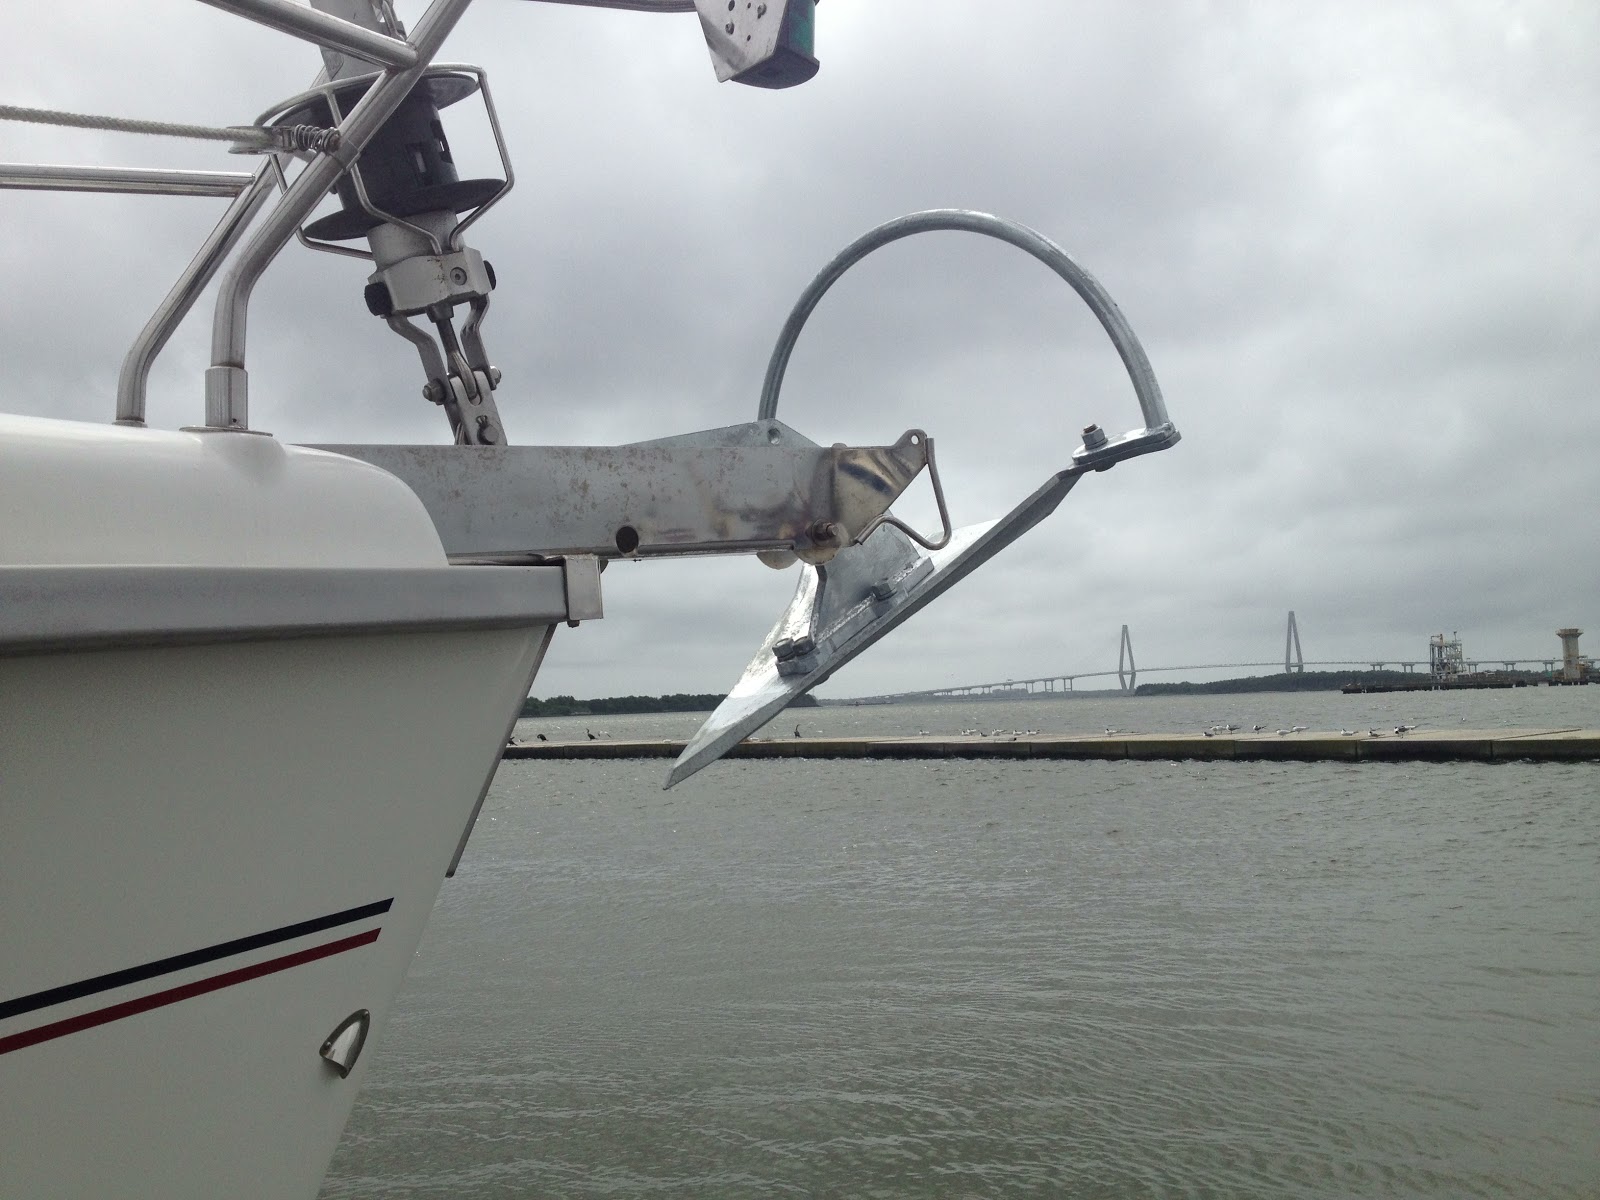 The anchor that came with the boat was a 45-pound CQR that had been painted and was rusting again. I had tried stripping all the paint off and repainting with a galvanizing paint, but it didn't hold up for very long. Professional regalvinizing costs nearly as much as a good used anchor, so that didn't seem like a good option. We had not had very good luck getting the CQR to set in the silty mud of the local creeks, so I just couldn't trust it to hold in the Caribbean. In searching for new ones, I ran across the relatively new design Mantus anchor (http://mantusanchors.com/). Where a 45-pound CQR, Manson Supreme, or Rocna are normally recommended for a boat our size, Mantus recommends a 65-pound. After viewing the many videos on the Mantus website, I was convinced this was a great anchor for the conditions that we would see in the Caribbean. For about the same cost of other spade-type anchors, we were able to get a larger anchor that appears to have great holding capability. Several people in the online discussions expressed concern over the bolted connections, but I've been impressed with the design and construction. The Mantus never failed us and I slept without worrying every night.
Later, we ordered a Mantus bridle and I was also very impressed with it. The specially designed stainless chain hook stays on the chain very well. The bridle also includes a spring hook for tying up to moorings. Finally, the chafe guard on each end of the bridle is robust and should last a very long time.
Ventilation
 Take a woman to the Caribbean and you know what you have to have a lot of? That's right. Fans. Although we installed the diesel generator for the primary purpose of powering the airconditioners, it just won't be feasible to run the generator all night, every night. When we bought the boat there was only one fan installed. We've since installed three more and have another one that just arrived in the mail. There will be one Caframo Sirocco for each side of the master aft stateroom, two Caframo Two-Speed Compact fans in the main cabin, and one unknown-brand fan in the guest berth. My favorite of all these is the compact Caframo, as it seems to move the most air, costs the least, and uses very little power.
Anchor/Deck Washdown
 This installation takes advantage of a high output freshwater pump that we installed a few months ago. The flowrate from the freshwater pump isn't as high as that of a washdown system, but it has adequate pressure to wash the anchor and chain. Because the system draws water from the freshwater system, it can also be used for washing the deck. We have a watermaker, so we're not concerned with drawing from the freshwater system.
 Installation was simple, using quick connect adaptors to Tee into a cold water line near the bow and to connect to the stainless steel valve. As always the most difficult part was routing the new 1/2" tubing behind the liner. This task was eased with the help of my new electrical snake that we purchased for the TV antenna project.
TIP: Lowes has a much better stock of the 1/2" plastic hose and fittings than West Marine.
Whisker Pole
 Wow! I didn't realize how expensive sailboat parts were until I started shopping for whisker/spinnaker poles and hardware. I lucked up and found a whisker pole (fixed length) locally for $250. This pole came with a "socket" type fitting on the inboard end, and requires a special toggle bracket on the mast. A mast car with the toggle bracket would have cost over $500, and since our mast doesn't have a rail the total cost to mount the pole on the mast would probably exceed $1000. Forespar has a fixed mast bracket for the price I paid for the pole, and two deck chocks bring the total pricetag to about $600. Mounting the chocks to the deck was straightforward. TIP: Always chamfer holes through gelcoat to help prevent surface cracking. I chamfer holes in the deck by running a large drillbit in reverse first, then drill the screw hole using the smaller bit. I inject DOW 4200 in the hole to keep out moisture and to keep the stainless screw from rusting.
Here is the fixed mast bracket installed on the mast. Ten #12x3/4" stainless screws hold it on the mast. The vertical location is determined by attaching the outboard end of the whisker pole to the jibsheet, holding the sail out to the side as though you were sailing downwind, then hold the pole level to see where it falls on the mast. Forespar, and others, have excellent intructions and videos on how to use whisker and spinnaker poles.
Window Replacement
 When you can't see through a window, then it's time to do something about it. There are a few temporary fixes out there that might extend the usability for a year or two, but eventually you'll have to replace the glass. Before ordering the Plexigass, I first measured the thickness of the existing material and found it to be 3/8". Next, I took measurements of all the glass that I wanted to replace, and created a layout on a scaled drawing. I was able to fit all the pieces, except for the two main windshields, on one 4'x8' sheet. I had previously replaced the glass on our Hunter 32' Vision sailboat and had used dark bronze, color #2370, and it seemed to match the old glass pretty well. I figured the glass on the '98 Hunter 410 was the about the same color, so I ordered a full sheet of 3/8" Plexiglass in dark bronze.
Ideally you would want to take all the glass out of the boat and trace the outline onto the new glass, but we live too far from the boat to be able to do that efficiently. Instead, we held large sheets of paper on top of the old glass and traced the outline using a pencil. Using a tape measure, I measured the two major dimensions and cut the rectangles on a tablesaw with a 60-tooth carbide tipped blade. Next, I taped the tracing paper on the rectangular pieces and followed the traced outline around the corners on a bandsaw. Sanding with a belt sander helped to smooth the cut edges and also smoothed the curves. Finally, I scraped the edges and corners with a scraper to make them nice and smooth.
A sharp pocket knife is used to cut the accessible sealant around the outside of the ports. For the hatches, the same pocket knife blade can cut between the two-sided padded rubber tape and the old glass. Then it's just a matter of pushing the old glass out. For the fixed frameless ports, a putty knife can be used to cut between the old sealant and the glass.
To prepare for installing the new glass, I clamped the old and new glass pieces together and match-drilled holes. The holes appear to be metric, but I used the next larger sized SAE bits and it worked out fine. I used a 5/8" Forstner bit for the largest hole, and 25/64" twist drill bit for the slotted hole. A drill press or a router template would have made the slotted hole a lot easier and cleaner, but the setup time was prohibitive for my situation. While trial fitting the fixed port glass, I cut the paper on the interior side of the glass with a pocket knife, using the window opening as a guide. I peeled away the perimeter paper and sanded the exposed glass for better adhesion. Finally, I cleaned all mating surfaces with lacquer thinner.

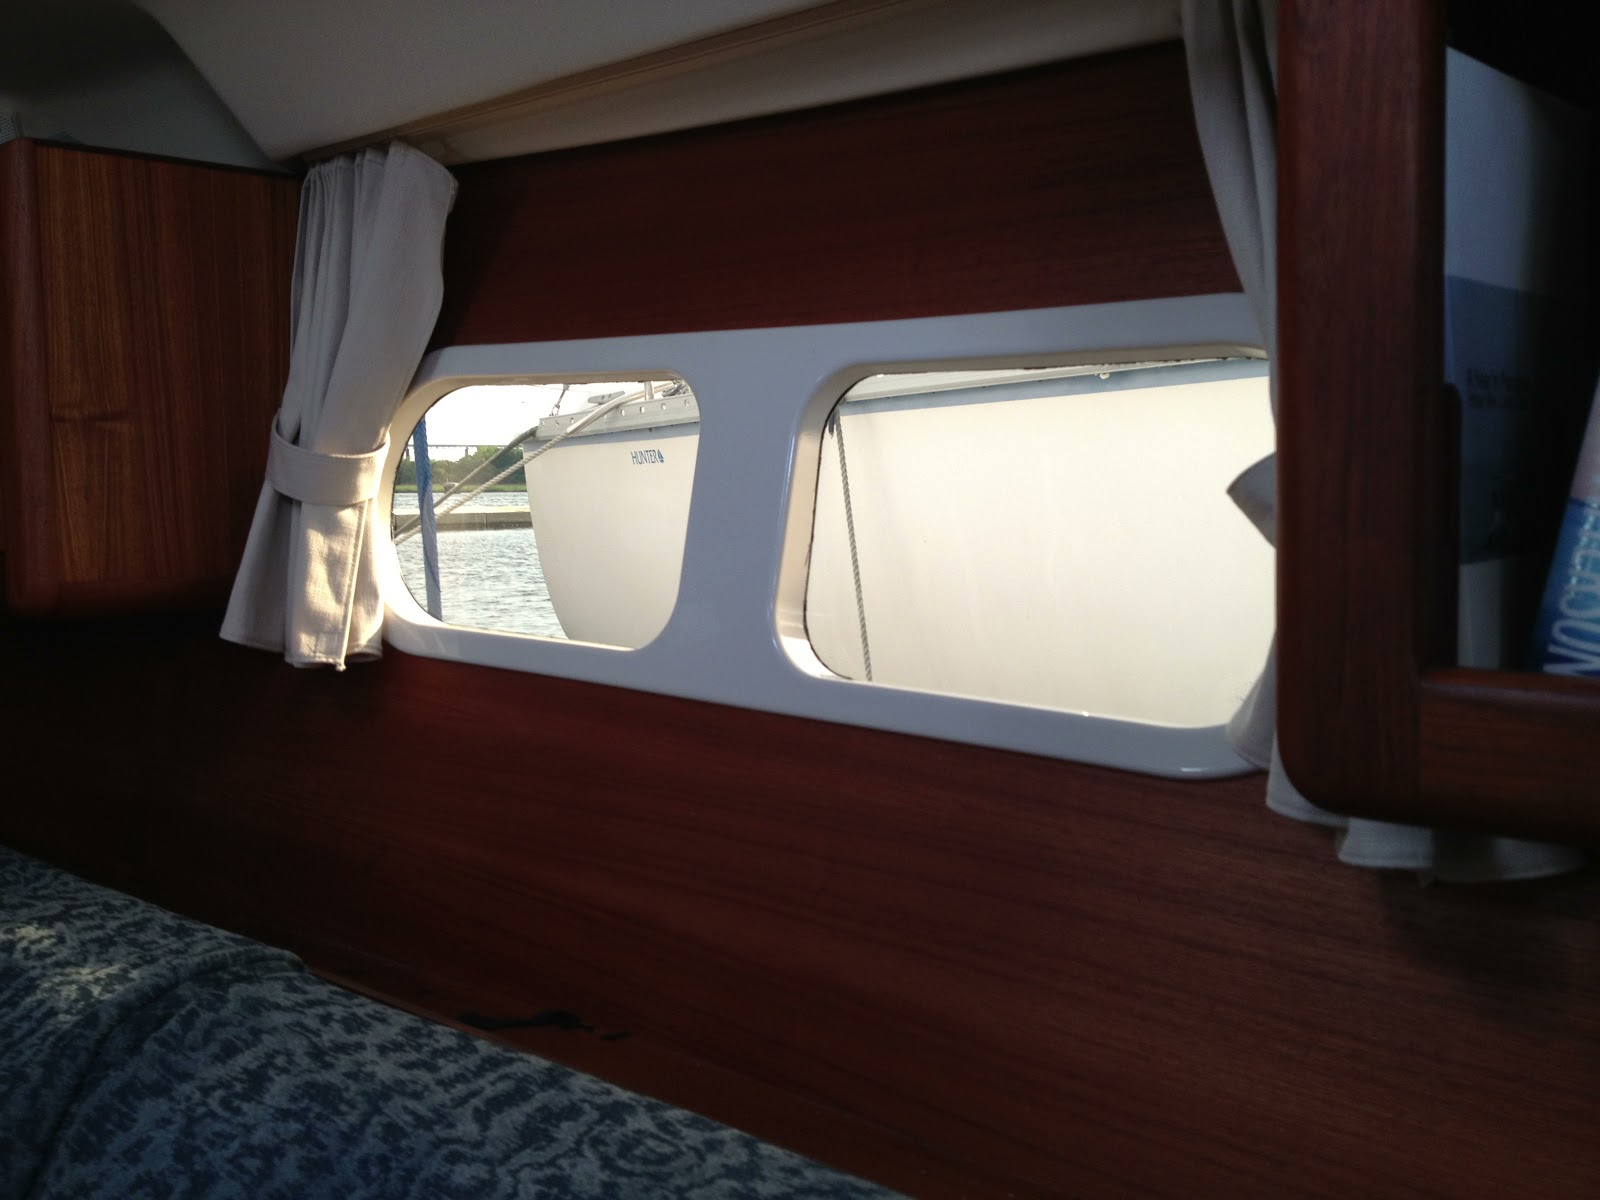 Before final installation, masking tape is applied to the window opening to prevent sealant from making a mess on the boat. Three tubes of Dow Corning 795 (Black) were used for the three frameless fixed ports on the hull and for the 7 smaller Lewmar hatches above deck. Initially I smoothed the joints with my finger, but that caused the joint to be too deep. Later, I used the end of a Craftsman screwdriver handle and it created a very neat joint. You want to immediately remove the masking tape and masking paper before the Dow 795 has a chance to start curing. Here you can see that the new Plexiglass provides a much better view.
 The above-deck fixed portlights do not have screws holding them in place. Realizing that it would be nearly impossible to come up with a jig that would hold the new plexiglass steady while the adhesive cured, I decided to temporarily install small screws. After the Dow 795 was cured enough to hold the glass in place, I removed the screws. Next, I covered the holes with masking tape to prevent making a mess on the glass, and punched a hole through the tape at the screw hole locations. I filled the holes with adhesive, wiped away the excess, and immediately removed the tape. The filled holes are barely noticable, and I'm sure they look better than if I had tried to install the windows without the screws.
LESSON LEARNED: The three largest Lewmar hatches appear to have 7/16"-1/2" thick glass rather than the 3/8" found in the smaller hatches.
LESSON LEARNED: The dark bronze color #2370 doesn't match any of the existing glass in the hatches on the '98 Hunter 410. However, #2370 does seem to match the fixed-light windshield. The old hatch color probably is more of a medium gray than a dark bronze. The darker bronze cuts down the amount of light noticably and helps keep things cooler inside.
Rebedding Stanchions
During the initial survey, we found that there was some moisture and a soft spot in the non-skid on the port deck. The likely cause was a loose stanchion screw or deteriorated sealant. On a boat of this age, you can assume that all the sealant used for the deck hardware has hardened and cracked. We now have the advantage of a new type material for bedding hardware, called butyl tape. There is a wide variety of butyl tapes, but I bought this from Maine Sail (http://www.pbase.com/mainecruising/butyl_tape) and have used less than half a roll after rebedding all stanchions.
 Like most things, preparation is key. Both surfaces need to be clean of all contaminants. I scraped all the old sealant from the deck and from the bottom of the stanchions, and cleaned mating surfaces with mineral spirits. A very important step that should not be skipped is to countersink the screw holes. This provides space for a little extra butyl tape to collect while the rest of the tape is squeezed out from under the stanchions. Tape is applied to the entire area of one of the two surfaces. In the photo you can see how I've covered the area with tape, and also how I've countersunk the holes.
 Next you'll need to place the screws in the stanchion screw holes and apply a small bead of tape around each screw. This bead of tape will fill the countersink. While holding the stanchion off the deck, alternately tighten each screw so that you don't push the small bead of tape down the screw. Doing so may cause all the tape to start wrapping around the screw and making a big glob. The tape flows very slowly, so you have to go back and tighten the screws many times over the course of a couple of weeks. I go ahead and trim the excess as soon as I finish, then come back in a few weeks and trim it again. There are many steps to this project and it's a fair amount of work, but this is one project that won't need to be repeated during our lifetime.
A Bigger Shower
 Although I'm grateful to have a separate shower stall, I saw room for an improvement. Thinking back to those curved shower rods that you see in some hotel rooms, I removed the shower rod from the aft head and made a few adjustments to the shape. Now we have an extra inch or two of shoulder room and the shower curtain doesn't keep sticking to me like it did before the mod. The shower curtain is long enough that it still fits over the shower threshold. So there you have it. Another few inches of space that didn't cost anything but a little time and effort.
Winch Cleaning
 This is just routine maintenance work, but I find it interesting. Lewmar winches are fine pieces of engineering, and I'm amazed at how easy it is to take them apart and put them back together. There are a few parts that are interchangeable, so it doesn't matter if you mix up bearings or ratchet pawls. All the other parts will only fit the right way, so you don't have to worry about reassembling them incorrectly. There are two key parts to this project. Clean all the old grease from the gear teeth and other mating surfaces, and lightly grease all those same surfaces with a good quality grease. I use Lewmar's winch grease, as it's a high-pressure, waterproof grease and is available at West Marine.
 Fresh Water Accumulator Tank
As mentioned earlier, we upgraded the freshwater pump to a higher capacity, higher pressure, pump. It's a variable speed pump, which means that it doesn't come on at full capacity immediately when the water pressure drops. The result is that the water pressure cycles up and down as we're taking a shower or washing dishes. I installed a Jabsco 1-liter accumulator tank in the freshwater supply line and it helps to maintain a more stable water pressure. If I were doing this over, I would pair a conventional pump with built-in pressure switch and an accumulator tank.
Really nice job on your posts- keep up the great work. You have encouraged me to post more of my trials and tribulations as well- just hope HOF can simplifytheir requirements for an owners improvment post!
ReplyDeleteEianm
I just finished reading much of your improvements and I'm exhausted!!!! I owned a 1998 Hunter 410 back in 2007 and spent the summer on the Great Lakes. I then sailed it down to Vero Beach Fl the spring of 2008 and returned to Deltaville in May for the fire that totaled her June 1 of 2008. The neighboring boat caught fire and took three others....all on the hard.
ReplyDeleteI've since replaced it with a 2000 Hunter 410. I added davits from Vancouver B.C. and found I was still able to open the aft hatch covers just fine. I replaced the 22 lb Delta with a 35 Delta and still wasn't pleased. I now have a 45 spade and am 100% pleased. I know you "sail" on anchor and is very bothersome. I purchased an Anchor Sail from Bannerbaymarine.com two years ago and am completely pleased with the performance. It shortens the moving by about 75% and the frequency of "tacking" on anchor. I float back and forth much like "normal" boats in an anchorage.
The original rudder post on 1998's were carbon fiber and were prone to break and were often replaced with stainless posts. Did you "upgrade" to stainless? I replaced all interior lighting with LED and cut my consumption down significantly. My anchor light is now a 35 element LED and one of the brightest if not brightest in an anchorage.
I hope you enjoy C-Time as much as I enjoy Sailstarr.
The PO left an anchor sail on the boat, and I've watched a video of how to use it. Hopefully it'll work well with minimal fuss.
ReplyDeleteThe new rudder shaft is all stainless and is working well. I don't think we'll have to worry about it breaking off.
Thanks for the blow by blow projects. I am preparing to buy a 2003 410, and you have inspired me to take a more active roll in making small improvements, as well as, what to look for in the upcoming survey.
ReplyDeleteClosing on a 2006 33.1 today. Not my first boat but the first one I don't have to do and serious refitting on. Your upgrades and maintenance suggestions are very helpful, thanks for sharing what you have done.
ReplyDeleteHi guys have you ever had to remove the fuel tank or know anyone that has. We are looking for some ideas on the best way. Apparantly the fuel tanks only last about 17 years at best. Its worth get yours presure tested. Steve & tracey oz. Our email, tracey.5@gmail.com.au
ReplyDeleteHey Steve & Tracy,
ReplyDeleteWe're not aware of anyone who has replaced their fuel tank. Personally, I'm surprised that plastic fuel tanks would deteriorate that quickly. I hope ours doesn't fail anytime soon, as it would require that we remove the aft stateroom bulkhead.
Good luck with yours.
Hi yep that's what we have to do. Removed the buld head today. Not that hard. They use a lot of rubber compound to hold together the paneling and keep it in place. Had to go very slow so as to not damage the paneling. The sides of the bulkheads are glassed it in so i had to cut through them.
DeleteIt took him a few hours to get up the guts to cut it. I consulted anyone that i thought had an exprience to see if there was an alternative. No such luck.
Ours fuel tank is aluminum. The surprise was once you get it out, it wont fit through the cabin door. Lucky our man that's going to reweld it, said he could do it in the berth. Tragedy averted. It gives great access to other pipes so I replaced them all whilst it is out.
I found a gold mine of screwdriver, nut, bolts and cable ties. We will let you know how it all ends up might be a week or so before the welder can do it. The jobs a bit beyound me. Cheers S & T
Great job! I also have a 1998 hunter 410 and I am so excited to have found your blog. My 410 's rudder has also suffered from a de lamination this season,. I was wonder if you don't mind how much did your new rudder cost. I will have to make the decision soon as to repair or replace. Are you happy with your decision and the end performance of the rudder. Did you dissect the old rudder and can you give me any insight into the construction of the old one that may help with my repair if I go that way? thanks so much
ReplyDeleteDave
Hey Dave,
DeleteGlad you found us. The cost of the rudder, as well as most all of our other pre-cruise expenses can be found under the "Pre-Cruise Expenses" tab. I believe the $2670 price that I've shown is just for the rudder and shipping. That did not include any other expenses associated with special tools or the haulout. There's no noticable difference in the performance of the rudder, but the bearings and steering are a little tighter. There may have been a little vibration before the change that is now non-existant. I'm definitely glad we changed it and don't have to worry about it any more, and I'm very happy with Foss Foam and their products. The only dissecting I did of the old rudder was cutting the shaft in half to see how it was made, so I can't give you any insight into a possible refurbishment of your rudder. I performed a Google search and found someone who had rebuilt their rudder, and that was enough to convince me that I didn't want to go that route. Good luck to you.
Daniel
Thanks for the quick reply Daniel, Sandra and I are really enjoying reading your blog, You guys are doing a great job. We have had our 410 for 6 seasons now and we are totally obsessed with it. We sail on Georgian Bay and we have done about 6600 nautical miles in that time. It is such a thrill to hear about your adventure and know that it is the exact same boat as ours. We won't have the opportunity to cruise her offshore for another six years or so but we keep improving her each year and enjoy learning more about her. We are really envious of you and Carla.
ReplyDeleteOur rudder post seems to be one piece of stainless. I think you mentioned that yours was a composite and not one solid tube of stainles. Am I understanding that correctly?
Funny to see that you have a Mantus anchor on C-Time. We too purchased one at the beginning of the season and found it to be a huge improvement over our old Bruce.
I haven't upgraded my lights to led yet due to the cost. Would you have a link for the supplier that you found. That is a fantastic price.
Daniel if you have any questions regarding our 410 I will try my best to answer them. I too have done my own maintenance on second wind for the last six years. With boating there is so much to learn.
Dave
The original rudder shaft was composite with stainless bearing surfaces. The new rudder from Foss Foam had a full stainless shaft.
DeleteThe EBay seller fort he LED lights is not current, but you can search for "6/12 SMD LED G4 Warm white /pure white Spot Lamp Bulb 10-30V". I paid $100 for 25 bulbs and free shipping. Again, these came from China.
Hi guys thanks for the tip on the LEDs. Bought 25 delivered free to Australia 89 dollars. Would have cost just under 400 in oz from the chandlers or electronic suppys. S&T
DeleteHi Daniel and Carla, really enjoying your blog and all the cool improvements you have done on your 410 Hunter. I am Davids better half Sandra and will have to start a honey do list for Dave to change some of the things we want differently on our Hunter 410 Secondwind. I think the list never goes away, always more things to do to make life easier on the water. I wish you both fair winds and calmer seas on your journey south. By they way its minus 16 here and lots of snow and David sledded up north to our marina to check on our boat on the hard, all is good. Enjoy the sunshine and warmer weather!! S/V Secondwind, D&S
ReplyDeleteHi Daniel,
ReplyDeleteThis is a great list and good tips. Can you tell me what type of paint you used for your anchor chain and how it has held up? I want to do the same this Spring and want to use the best paint so it doesn't ship off or fade too much.
Thanks
We just used regular Rustoleum spray paint. We've been cruising for about 3 months now and it's still visible and usable.
DeleteI am looking to replace my generator with the Nextel 3.5. I am concerned that it may not start the watermaker pump. What hp is your watermaker pump? Would you recommend the Nextel watermaker?
ReplyDeleteGreat Blog Dabbl is leading Shower Company provides top class products such Shower, Enclosures, Sliding Glass Doors, Shower Glass, Screen Hinge, Pivot, Frameless, Custom, Corner, Quadrant, Walk in Shower Enclosures and many more so call us now at 0086-757-88629686 email me at export2@dabbl.de Shower Enclosures, Glass Shower Doors
ReplyDeletethanks for sharing this blog, if you need Aluminium Partition Fabrication in Gurgaon please contact us.
ReplyDeleteThis comment has been removed by the author.
ReplyDeleteI am really impressed after read and see this post because that's really helpful for boat power adapter and other information.
ReplyDeleteGenerator Adapter For House
Enjoyed reading the article above, really explains everything in detail, the article is very interesting and effective.Thank you and good luck for the upcoming articles. Affordable Boat Upholstery USA
ReplyDeleteFlorida Boat Upholstery
Hi Dear,
ReplyDeleteI like Your Blog Very Much..I see Daily Your Blog ,is A Very Useful For me.
Tdpep is a trusted dealer of GPS fishfinders, discount fishing supplies, boat outfitting in USA. "Boat Outfitting" We provide the highest
quality of products with affordable rates.
Visit Now - https://www.tdpep.com/
Enjoyed reading your blog. Wonderful work and description.waiting for a more new post. Convertible top Oshawa Ontario
ReplyDeleteBoat carpet in Oshawa Ontario
We specialize in Marine Hardware products. Our motto is to high quality, low prices, fast shipping and taking care of our customers.Everything is double checked and electronically tested before being sent out to ensure the highest quality.
ReplyDeleteDaniel did you replace the two front facing salon large curved windows when you had C-time? How did you bend the plexiglass if you did? We have to do ours this fall before winter sets in.
ReplyDeleteBuy our Tarpaulins Cover Are Dealing in All Kind of tarpaulin. Whether It For Gardening, Camping or Just For Casual Household Use. We got every Tarp for you.
ReplyDeleteThis comment has been removed by the author.
ReplyDeleteThis comment has been removed by the author.
ReplyDelete